Remember when I said that I needed to do a Dinn's fire inspired necklace and my Zelda spell jewelry set would be complete? Yeah? Remember how I said that it would be great to get all three incarnations together and just photograph them side by side or something? Yeah? ....I don't think that's ever going to be possible.
Not only was Dinn's fire a wrist-breaking experience in crafting intricacy, but as soon as it was done, I sort of...gave it to my mom. *shrug* Sorry folks. At least I got photos of it first.
Charm bracelets are one of my least favorite jewelry item to make, wear and even SEE. I've always thought of them as tacky. When they first became super popular in the mid 90's (that's the earliest time I remember seeing them at least), they disgusted me. A charm bracelet is essentially a trophy collection that you wear around your wrist. It's easy to go overboard.
What a hideous notion. Keeping everything that you feel defines you dangling off your wrist to show off to the world. That can quickly become hideously gaudy. It violates all of my mysteriously present Victorian sensibilities and inclinations against bragging.
While I abhor the idea of charm bracelets because of their tendency to stray into the 'that's waaaay overboard' territory so easily, I have discovered some charm in themed bracelets. These bracelets operate on similar mechanics and design principles as charm bracelets...however they tend to revolve around a specific theme or aesthetic.
For example, one of my bracelets that has long since left my possession:
Notice the recurring colors, charms and uniform placement of the elements.
This one is a handful of strawberry lockets, enameled beads, and Czech glass. It follows a color scheme, uniform pattern, and all of the recurring elements are positioned at different heights so their individual visibility is maximized. It's not busy and it doesn't look like you put your trophy room on your arm in an attempt to validate your worth as a human being.
Unfortunately, Themed Bracelets, still fall in the realm of Charm Bracelets, so, there's that. Well, enough of that. I'll show you more pictures of my Themed Bracelets so far.
I'm a 'Spooky Kid' so there should be no surprise that Jack Skellington is here.
And finally a Captain America inspired charm bracelet I made somewhat recently. Well, that's all for this post. Happy Crafting!
For Christmas, one of my friends sent me a pair of Skullcandy headphones. Another of my friends gave me a ton of glass beads and really intricate charms. I needed new headphones and, as a crafter, I always need new beads and charms. The charms were a great deal smaller than anything I'm using right now, so I was brainstorming ideas for them when it dawned on me that I could use them for a trendy craft project.
Come to Momma.
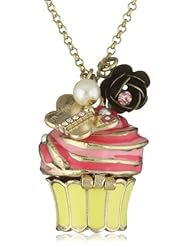
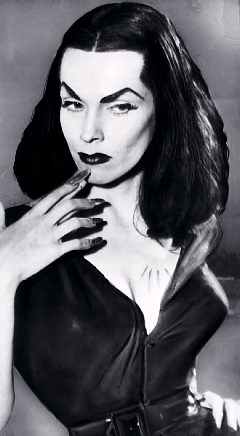
In stores, I've been seeing all kinds of heavily decorated headphones, blinged out ear buds and other music enjoyment paraphenalia. As much as I'd love a pair of earbuds that look like sushi rolls, bat shaped Mp3 covers, or a set of sparkly cupcake headphones, I can't see the point in buying them. Typically, these things cost a lot of money and are poor quality. Why should I pay $30 bucks for a pair of pretty headphones that sound like tin cans in a bag? So, it became my mission to vamp up my headphones. By vamp-up, I mean...
Maila Nurmi- Vampira
It's actually pretty easy to decorate a pair of headphones, once you know how you kind of design you want to follow and what shapes you have to work with. To get you started on your own DIY decorated headphones, here's a rough tutorial of how I modestly upgraded mine with just a few tidbits of craft supplies. To vamp-up, sweeten, or bling your own headphones, you'll ALWAYS need the following:
Headphones (Duh)
E6000 glue
Ribbon (I chose a velvety sparkling kind)
Fabric or Leather scraps
Charms and Rhinestones
A Color Scheme
I made a rough plan of what I wanted to do with them before I even got started. Skullcandy is NOT cheap and it would have been horrible if I messed them up permenantly. I started my design by examining my headphones to see what parts of their external plastic would be easy to decorate without compromising their ability to function.
They're PURPLE! Maybe I could work that into the design somewhere.
I spy with my little eye, a vestigial screw-port.
Remember kids, just because you can decorate something, doesn't mean you should. There's a reason they don't have a market for rhinestone exhaust plugs for your tailpipes.
After inspection, I started to make stencils of the parts I intended to create decoration arrangements for. This is important because it helps you get your placement down before you mess up anything.
First I roughly traced the half circle onto some paper, then checked it against the headphones to ensure accuracy...
Then I 'doubled' the half circle with a vent cut out for the movable stems on the ear-pieces.
After I'd drafted a stencil to use, I brainstormed how I wanted to dress them up further. I was able to narrow down what sorts of charms would work best with the current design of the headphones, where they would go and how I could tentatively line them up. Since I already like the Skullcandy logo, I decided that I wouldn't cover it up.
Scrap leather from an old coat. A bit of the old lining still clings to it.
I didn't really want anything TOO outrageous. Just a little glimmer here and there, you know? I traced my stencil for the sides of the headphones onto some scrap leather, then cut it out and glued it where it belonged. I continued gluing things down according to the plan until the headphones were finished. You'll see a final design on my next post- Tomorrow.
Many people have trouble picking gifts for their loved ones. You have to figure out if so-and-so is still into this thing or that thing. Gift-giving requires a lot more brain-power than we're used to. You have to relate past events, decipher a person's behaviors and common motives in order to get something good. That takes effort. People don't like EFFORT. Each year, I'm sure that tons of women get gifts of scented bath things, gift cards to decidedly 'girly' stores, jewelry or something else that makes people state proudly that 'buying for women easy'. What a joke.
....yay.
Buying for women is the same as buying for guys. Still it's a lot easier than people think- IF you pay attention. That's the key to never forcing someone to feign joy over a pitiful gift ever again. Pay attention to what they like. Take note of what they get excited over, what they talk about, what they use often, and what they haven't already bought for themselves.
A few years ago, my friends and I took a vow to never buy the 'typical' go-to gifts for women for each other or anyone else ever again. So far, it's been a success. No one gets jewelry, knick-knacks, fragrances or lotions unless it's something really cool that they haven't heard about yet, or it's a fragrance that we already know the recipient likes. Nothing is returned to the store, no sad faces appear at our holiday parties, and we, as a group, get the best gift that can be given: frequent heart attacks brought on by the terror of unexpected shrieks of excitement.
You're happy, but we need a better way to express it.
The fact that we pay attention to each other's likes and dislikes isn't just a way to ensure we get the perfect gift. It also forces us to have a better and deeper understanding of each other as people. We have to listen to each other, observe each other's moods, and share in each other's favored activities even if it's not something we'd pursue on our own. We're face-to-face with each other's differences and we learn appreciate every single one.
It breaks barriers that we didn't realize were there and makes us stronger as a group. We share our triumphs, trials and embarrassments. We aren't caged by self-doubt or suffering in silence, because we're aware that there's someone who will listen and help without judgment. Or... you know, we could all just be crazy.
I don't think we're crazy. I honestly think we've got a good thing going. Our interests are reaffirmed by our peers. We're constructively and actively listening to each other. Most importantly, the people we share our lives with are willing to be HONEST with us when we're wrong and supportive when we're not.
Since Valentine's Day is coming up, take this into consideration before you buy someone a lame card, those God-awful chocolates, or worse, some uncomfortable chaffing underwear that's more for you than them: Any holiday that is about LOVE, APPRECIATION, and CARING should only include gifts that are purchased with the goal of making the recipient happy.
Now that you've seen my tutorial for making a fancy little hat fascinator (If you haven't, Here You Go), I felt that I needed to put my own instructions into action and give you a little snippet of what I've done with this handy, dandy bit of knowledge. Be aware, there aren't many pictures of this first attempt because well, it's the first try. The first try either blows all normal conventions out of the water or is a simplistic precursor to the fantastic.
I made this hat using the 'Purchase and Decorate' method and I'll be honest, it was hard to get it started. I'm not sure if it's just me, but when I get something ready made, it takes my brain a moment to make the leap to Creativity Land.
Courtesy of Pacroid.blogspot.com
Setting a design is always the hardest part. It's even harder when your brain forgets that this little hat is NOT complete and needs some pizzazz. Mine chose the moment that I needed it to create things to go on a vacation, so I borrowed mom's. Her brain was stuck on netting and tulle. The fluffier the better.
It's not fluffy enough.
I wasn't so sure about this idea, even after she regaled me with photos of fancy hats decked out in fluffy stuff. As a rule, I only like fluffy skirts, kittens and cupcake frosting. I became a little afraid when she declared, "More tulle! MORE! Use the whole roll!" But I did as she suggested. I pleated the tulle on one side to form little lumps that remind you of one of those 1940s hairstyles and tied it into a big fluffy bow in the back of the hat, secured it with a few drops of glue.
Like this but with less film star attached to it.
I needed to tulle it up. The hat would have been pitiful without it. After we tweaked and poked at the hat, we both determined that it still needed something... I decided that it needed something shiny to balance all the matte textures. The end result was this.
Big tulle bow worn in the front.
Big tulle bow worn on the side
The good thing is that the tulle bow feature looks great. The bad thing is that the rest of the hat looks a little plain by comparison. In the near future, I may add more to it...I need to go craft shopping first.
So, I'm sure you all remember the tutorial I did for Fascinators and hats not too long ago. If you don't, here it is. Well, I made that tutorial before I learned that there were other construction options available to those who don't want to devote a ton of time stitching, starching and wiring. It seems that there are pre-made hat forms with the clips already attached available from eBay. All you need to do is decorate them. Well, don't that beat all?
So now you can make a nifty fascinator in less time, gathering fewer materials and without having to use every craft skill known to man- unless you WANT to. So here you go! Hatter Madness Tutorial number 2!
Materials:
1 Mini-top hat, bowler, tricorn or high top-hat
Glue (Locktite or E6000)
Scissors
Ribbon
Some feathers
Silk flowers
Beads and other decorations
And now the instructions. You'll be surprised at how easy they are!
Instructions:
Assemble the materials you want to use.
Make a basic design arrangement for your hat.
Glue the items to the hat in an order that best balances the decor and hides any unfinished edges.
Allow it to dry completely (Very important. You don't want to super glue a hat to your head)
Ok. I've forced you guys to wait long enough. Any longer and this will read like a really bad horror movie and you'll all leave me to be swallowed by the monsters of my own making. I'm going to cut to the chase. Starting with the scarf made of jersey knit.
I gave this one to a friend. Such a pretty color!
The above scarf was less than a yard of fabric. It's comfortable, slightly stretchy and keeps your neck warm without making you too hot
Oh Starry Night!
The scarf above is actually made of a sheer woven fabric that I can't remember the origins of. I only remember that it was very pretty and it ended up in my shopping cart. I had enough fabric to make two scarves and they came out rather stylish. Since the fabric is woven, it does not stretch, but it's long enough to wear creatively and looks great with jeans and even with my hoodie.
Hello world!
I think I smiled waaaaay too big in this one.
The red scarf was made out of a SUPER STRETCHY knit of mixed fibers. I purchased it as a remnant from Vogue Fabrics on Roosevelt Road. At the time, I was thinking of making a top out of it, but when the time came to cut it out, the pattern was difficult to line up in a flattering way.... So. SCARF! The fabric's drape and body lends itself nicely to the look of elegance.
The final scarf!
I actually made three of these. I bought the fabric at Vogue, on sale. It is a grey, black, and white stretch knit with little hairs all over it. The weave is kind of open, so it breathes and keeps you relatively cool. However, the scarf is VERY arm. This fabric is the only fabric that I bought with the sole purpose of turning it into a scarf . I was planning to try out infinity scarves on a day when I was tired of applying to jobs all day, so I wanted a fabric similar to the kind I saw used in the expensive scarves at Carson's. I found it at Vogue. And here we are.
Special thanks to my mother for taking the photos. I couldn't have done it without you.
Infinity scarves are awesome, right? On average, a good infinity scarf can cost between 15-40 dollars. Depending on the materials and where you look they can cost even more. Some of them cost over $300 dollars! If you don't believe me, check out the Diane von Furstenberg website and don't forget to catch your chin before it hits the desk. Infinity scarfs are incredible, versatile little accessories. Of course, they cost a lot of money. They must be hard to make.
Well, there's a trick in there. They actually aren't hard to make. To me, the real value of the infinity scarf is in the materials that comprises it. Since it's so simple, I figured it out on my own. To be sure, my mom and I both had been looking for an easy project to get rid of scraps. Every sewer LOVES to get rid of scraps.
Like many sewers, I like good knit fabric with rich colors and simple, but bold patterns.
It's great for making tops, arm warmers, and the like. However, I
locate my best materials in the remnant room. All coiled up, a remnant of fabric can look like much more than it
is. And when you get it home, it's stained, there was a glitch in the
pattern, or it's torn in an odd place. So, in effect, you've got a nice knit fabric that will either lead to a very long game of sewing table Tetris or a big pile of disappointingly large scraps.
I don't sew that much and I have a ridiculous stash already. I needed to make use of my scraps and pieces of fabric that are just big enough to get you into trouble. Turning it into a collection of infinity scarves was the best solution.
Here are the steps I followed to turn my fabric into something worth while.
Step 1: Cut and Measure
You need to decide how long and how wide you want your scarf. The trick I used to determine a regular length for my scarves follows the rules of necklace length. There are 6 main necklace lengths.
Borrowed from Jewellerygem.com
When applied to an infinity scarf it can change the way you wear it and increase its versatility. I chose to have my Infinity Scarves fall at about 40- 45 inches. There were two reasons I chose this length. 1. It gives you enough room to loop it around a few times and use it as a cowl if it gets blustery. 2. It's a common fabric width, enabling you to reduce raveling as you handle the ends of it because the very end of the fabric is actually the selvage.
I made my scarf widths between 8 and 12 inches. Some of the materials I used were on the thick side and it wouldn't be a good idea to make the scarves wider because the end result would probably accidentally choke someone. Save the wider scarf widths for thinner materials.
Step 2: Stitch, Turn, Stitch
This is the easy part. Fold the fabric lengthwise, with the 'good side' facing inward. Stitch one seam down the cut ends of the fabric. I used a serger because the fabric I used were fuzzy and needed to be contained.
Next, Turn the scarf right side out, so your seam allowance isn't visible.
Finally, pin the seams together so you can start sewing the two ends of the scarf together without twisting it up. Sew the ends together so that the seam allowances will be inside the scarf. Since your scarf currently forms a little cylinder, you can't just sew straight across or sew it completely closed. Leave about 2 inches open.
Step 3: Blind stitch
Finally, I close up my infinity scarf by blind stitching that hole closed. It doesn't take long, about 5 minutes including needle threading time. Once it's done, you've got a nice infinity scarf to go flouncing around in. Easy huh?
For those of you who are more kinetically inclined, check out this gal's sweet youtube video.
I was surprised how much her tutorial matched my method. I am glad I found it though.
Finally! My next post will include my infinity scarf creations!
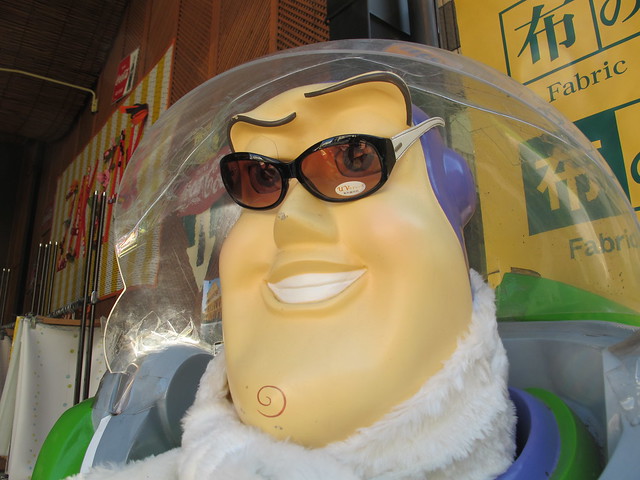
You've all gotten the memo, seen the trend, heard the buzz... Get it? Buzz?
Courtesy of Samm Bennett's Flickr
Yes that's Buzz Lightyear wearing a scarf. Even he knows that scarves are the in thing right now. They have scarves for all seasons: thick, thin, sheer, opaque, bandana styled, ascots, regular old scarf scarves and even Infinity Scarves. No. Not scarves times infinity, but a specific style of scarf that forms a continuous loop.
The Infinity Scarf is a versatile fashion accessory that can comes in a variety of widths, lengths, colors and materials. You can do just about anything with an infinity scarf. It's continuous loop design keeps it from slipping from your neck and enables you to adapt it to suit your needs. You can wear it as a cowl, layer it around your neck like a regular scarf, loop it over your
head like an opera length necklace, cross tie it around your body to
make a comfy beach top and even use it to tie up small children.
Courtesy of Pinterest
Simply by changing up your accessories and how you position the scarf, your infinity scarf could act as other garments you wear regularly. Belts, vests, cardigans, shawls. You name it.
Check out this video where SecretLifeOfaBioNerd shows us how to wear a wide infinity scarf 21 different ways.
The other great thing about infinity scarves is that they are so, SO easy to make on your own. With that said, I'll conclude this post by announcing that I will be posting a brief infinity scarf tutorial in a day or two and that I MAY run a contest. Keep your eyes and ears open!
Pay it Forward was a trend that I was curious about, but didn't understand. I'd seen the words pop up on Etsy, Deviantart, and a few other craft and art hubs. Sadly, with increased laziness and humanity's increasing inability to articulate itself (despite most entertainment and social networking leaning towards text-based formats), the best explanation of what 'Pay It Forward' was and meant was something like this, "Well, you know. Pay it forward. Like you pay it forward."
I asked several different people who were running 'Pay It Forward' advertisements and promotions on their blogs, art hubs, and Etsy stores. The answer was always something like, "Well, you know. Pay it forward." That's not an explanation! That's a tease. You've disappointed me again, humanity. Why do I keep trusting you to do better??
So, I sort of shoved that curiosity to the side and focused on other things. Since no one knew what Pay It Forward was, perhaps it was not important for me to know either. That is, until one fine literary lady posted a Pay It Forward comment on her Facebook. My reaction: Another chance to ask what the HECK this means! Yes!
So, I asked Ann what does 'Pay It Forward' mean. Being a former English teacher, she was happy to tell me. It's like a chain letter, but instead of forcing people to repost some annoying message in their status for fear of non-existent reprisal, you substitute the gloom and doom for a good deed. The theory is, that if it's handled CORRECTLY there's a recurring wave of good deeds and wonderful surprises that eventually works its way around the world. Ann's Pay It Forward was geared towards crafting. Golly Gee Willikers Batman! That sounds great!
OMG! For real?
I joined in on her pay it forward...and immediately ran into problems. Apparently, some people equate 'Pay it Forward' with 'Freebies' and are opportunistic scavengers who will not only assert, insist, and berate you until they get their free thing, but they will also belittle it and refuse to 'pay it forward' themselves. You know who you are.
What I learned from this whole thing was heartwarming (I think that was the point of it, actually). By sticking yourself out there and becoming someone's beautiful surprise, you not only enable them to be someone else's surprise, but you boost their self-esteem and motivate them to try and learn something new themselves. I have not delivered all of my Pay It Forward gifts, but the few that I have sent off to their new homes were met with glee and almost immediately a chain began to form.
My gift of yarn became mittens for someone who's always losing theirs, and the money that would have been spent on mittens was spent on supplies to make greeting cards, one those greeting cards was written in and given to an old woman, that old woman got up and made someone some cookies, those cookies were eaten at someone's craft party, the craft party spawned all manner of creations and it continues from there. One, long, heartwarming chain of good deeds. I hope that it continues beyond what I can trace and maybe, it will get to someone who really, REALLY needs an unexpected gift.
Do you like Betsey Johnson? She used to design patterns for the Vogue Pattern company. Now her name's featured on a line of ultra-bright, eclectic and glam-heavy high-end fashion including fragrances, jewelry and clothing. Her fashion line always features the hottest colors of the season in some really interesting designs.
Since I like eclectic jewelry and eye-catching statement pieces, I've always admired the construction and designs of many of her collections. Working at Carson's jewelry counter over the holidays gave me a first hand look at Betsey's stuff. I got to handle what I, previously, could only ogle online. Unlike most costume jewelry, Betsey's stuff is well-made, durable and features high-quality materials for extended wearing.
Photo Courtesy of ebay
The only thing that stopped me from buying any of her costume jewelry was the price tag. On average, a pair of 'simple' (really, Betsey Johnson has no concept of simple in her jewelry designs) earrings would cost $35-40 dollars. Can you say, sticker shock? A little problematic if you're on a tight budget. Little did I know, I could find the discontinued styles online at discounted prices on eBay. A $60 bracelet, can be acquired for a sixth of the price thanks to stores clearing out leftover stock.
But even better is the ability to Do It Yourself. There were elements to all of Betsey Johnson's pieces that I enjoyed, but also plenty that I despised. There is such a thing as 'too much of a good thing'.
Case in point
With the abundance of quirky jewelry making elements, I can make my OWN Betsey Johnson style jewelry. And so I went on a hunt for elements I could use to make my own Betsey Earrings. After a little work and a lot of tweaking, I got it to work for me.
Simple Pink Polka Dots
Black and White Polka Dots
Gray Plaid with Bows
Pink Plaid with Bows
I started small because I just wanted to try it out, but I'm fairly certain that I will experiment with adding more elements to my jewelry works in the future. It was an enlightening experience. Now I'm looking to expose some of my necklaces to the same treatment...but I'm sure I'll need to purchase more stuff...a lot more.
Working retail over the holidays kept me busy and tired, so I didn't go to many parties. Let's face it, you're not going to be raising the roof with your girls if your feet hurt so bad you start thinking it might be better to live as an amputee. No parties for me.
Knowing that I couldn't attend the Christmas shindigs or even stay in my own house to watch old Christmas movies really stung, so I was determined to make Christmas Eve fun for me- by making a hat. An ostentatious, LED lit marvel of amateur hat-making science.
This baby.
Let me start by first saying this: I had no idea what I was doing. This hat is something made purely on a whim, with no prior experience besides making hair clips. It also, very quickly, became an experiment to see how much stuff I could cram onto one small oval piece of felt without breaking my neck or having it fall off my head. Despite this, I think it came out nicely.
I had no pattern to help in making this so I sort of followed my own mind. It was actually fairly simple to make once I had assembled all the materials. I'll include pictures of the less common ones.
Materials:
Two sheets of craft felt
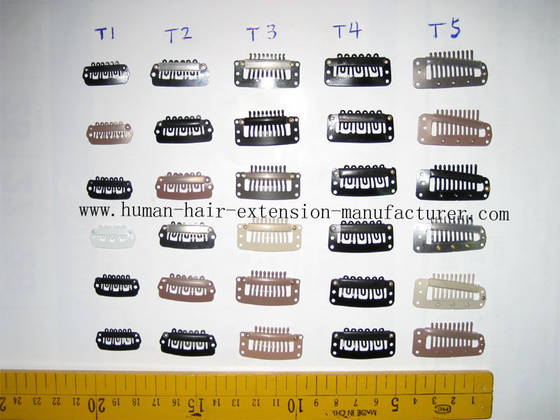
Two Hair extension combs
Hair Extension Combs: Photo From Human Hair Extension Manufacturer.com
Beads (Any will do)
Hem Tape
Garland
I used something similar to this
LED tea light
Christmas Trimmings
Scissors
Wire
Instructions:
1. Cut the felt into ovals. They will be your hat base.
2. Mark where you want to place the combs (it's important that they're
opposite one another otherwise it will fall off your head) Hand sew
them to one of the felt ovals.
3. Assemble your Christmas Trimmings (I got most of mine from the dollar
store). Determine the basic layout you want them in before sewing or
gluing them down.
4. Hand sew or glue (E6000 for the win!) your Christmas Trimmings to the other oval of felt. I wanted a light on my hat so I had to cut a hole so that I could reach the switch. I also wired a little golden Christmas tree light cover to it so the naked LED bulb wasn't showing.
5. Hand sew the two felt ovals to one another, making sure the combs and decorations aren't sandwiched between the felt layers.
6. Measure the perimeter of the felt ovals, and cut the wire to that length plus 2 inches. Twist the ends of the wire over it to secure them so they don't poke you in the head, then shape it to fit in your felt ovals.
7. Hand sew one side of the hem tape to one side of your felt oval. Fold the hem tape to the other side of the felt oval, tuck the wire in the fold, begin sewing the other side of the hem tape to your hat base, keeping the wire oval inside the pocket formed by the hem tape. Complete a full circuit around your hat, knot the thread, tuck the end into a hidden spot under the hat and wear.
I've noticed something odd and I'm sure that you have too. Recently, there's been a great rise in the appearance of miniature humans. Every day you can see them. You don't even have to go out of your house. Just peek out the window for a while and you'll see a caravan of pastel colored frippery, being pushed down the sidewalk by a tired, but happy adult as they march to the tune of squeaky toys, jangling sounds and the clicking hiss of rattles.
I'm talking about babies. Toddlers. Rosy-cheeked little ambassadors of high-pitched squeals and huge, toothless grins. Tiny, little humans. They are everywhere. They're infiltrating the nuances of daily life! For a while, it was common to see a few strollers while you were out. On public transportation you could count on seeing at least one baby, but all of a sudden, whenever I find myself on CTA, I see no less than 3-5 infants in strollers, snuggle carriers or car seats.
When I look out my window, I see parades of nannies, Mommies, and sometimes Daddies all walking along with their caravan of babies.
Just like that.
When riding on the expressway, every other car has a baby or evidence of a baby in its back seat, advertised with glaring pastel banners, baby Winnie the Poohs and stuffed teething rings. They're everywhere! It's like a never-ending Parade!
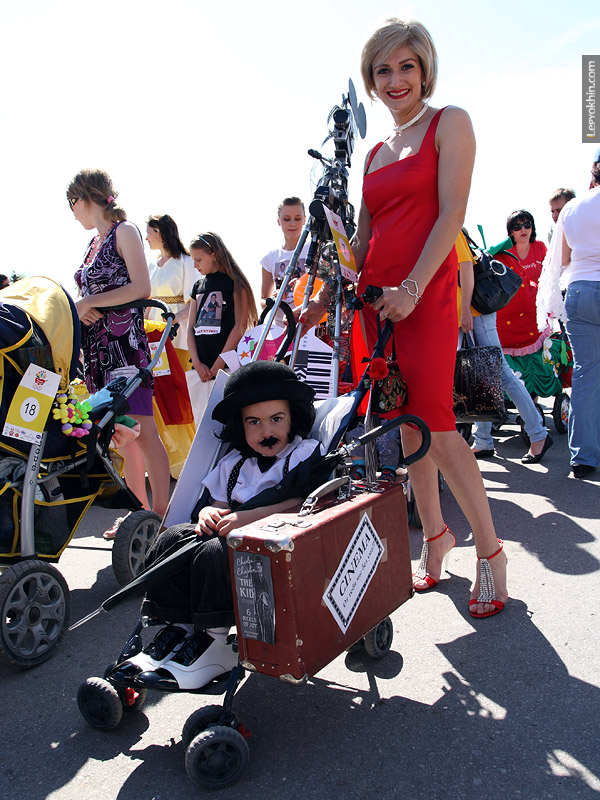
EXACTLY LIKE THIS
I like to think about why things are the way they are, so of course I thought about this. What changed in the last few years? I mean, we're still in a recession, folks shouldn't be having babies. Then, it dawned on me. I'm in my mid-twenties. Most people are planning the arrival of or have recently brought forth their first or second child. I'm also part of one of the largest generations there is. Generation Y. The Echo Boomers. The Millenials. The Peter Pan Generation. 95 MILLION PEOPLE BETWEEN THE AGES OF 19 AND 34! Prime baby-making age.
Well, that was easy to figure out. But, you'd think that with about 20% of us still unemployed, most of us working a series of temp and part-time jobs because of budget cuts, and our extended stay with our parents we wouldn't be able to care for children. But some of us are having babies. It may look like lots of us are doing it, but I'm pretty sure if you play the numbers game, the rates are low in comparison with the rates of previous generations. There's just so many more of us that it looks like a lot.
Babies. They're the future of our nation. It's important to make sure they have a good start in their lives so they can grow up to be the game-changers we need them to be. Recently, a cousin and a couple friends of mine announced that they are expecting adorable little girls. I'm excited. Especially since my realistic assessment of my life has led me to the conclusion that I'll be baby free for a while now.
I must live VICARIOUSLY. That's why I'm going to start making a bunch of baby-themed stuff! My babies (read: babies belonging to people I know) will have hand-made blankets, dolls, and butt covers- because I love them and because I'm living vicariously. Whatever. They get to feel special and loved. The parents don't have to pay a ton of cash for unique baby items and I get to exercise my creativity and create spoiled monsters.


.JPG)








!uBQ7R8QPl)!~~60_1.JPG)