If you've ever searched for a glamorous and unique gift for a glamorous and unique Hairphile only to come up empty handed, or flat out broke, this tutorial is for you.
Here are the materials you'll need before you start:
Leather of moderate thickness, no thicker than 3 mm, though.
Feathers
A 1.5 inch long, undecorated snap clip.
White Dressmaker's Pencil
Scissors
Exacto-knife
E-6000 Glue
Other embellishments
And here are your instructions, with pictures, yo!
Step 1: Draw oval shapes on your leather with your Dressmaker's Pencil. They should be about 2-2.5 inches long . Cut them out.
Step 2: Draw 4 horizontal lines on your oval. I use a special order to make sure I space them according to the hair clip size so that the leather won't interfer with the snap-clipping action. Draw the first line about half an inch from the top of your oval. The second line should be about 1/4 of an inch down from the first. The third should start a half inch down from the second and the 4th should be 1/4 down from the third. Easy? Easy.
|
|
| The lines are faint, but there. |
Step 3: Use your exacto knife to slice along the lines with a firm and even pressure. Don't slice like you're the serial killer in a slasher flick, slice like you're the plastic surgeon working on the face of a model who retired after someone threw acid in her face. VERY carefully. You may have to repeat in order to slice completely through your leather. Be patient. Neat lines will make all the difference when you start really working with this. In the end, you should have 4, straight and even slits
 |
You can see the end of my pinky poking out of one of the slices.
|
Step 4: Unsnap your snap-clip and thread it through the slits you've made. Start with the second slit, pushing the pointed end of the clip through it. Weave it through the remaining slits much like you would weave those pieces of construction paper together in grade school to make place mats. Once finished with that part, take the rounded back end of the clip and work it up through the first slit. Adjust the clip so that it rests evenly in its leather flap. When you're done, the rounded end of the clip should poke out of the 'top' of the leather flap, while the pointed end should poke out of the 'bottom' of it. Actually the pictures for this tutorial are a little off. I was rushing. The pointed end of the clip should come out of the rounded end of the oval.
|
|
| Observe as I take a picture with my shaky hands whilst gluing |
Step 5: Leave the clip unsnapped. This will keep you from accidentally gluing your clip SHUT. That'd be a bummer. Glue the rounded end of the clip to the leather underneath it. Be careful not to get glue on the underside of the clip. Now, glue the pointed end to the leather above it. Again, make sure not to get glue on the other parts of the clip. You will regret it. Press the leather against the two ends to help secure it and leave the clip to dry a bit- I usually wait about 30 minutes to an hour.
 |
| Actually, the clip should be put in the other way around. Having the rounded end of the clip at the rounded end of the oval leads to you having a face full of feathers. |
Step 6: Snap your clip shut. If it's dried enough, the leather will not snap off the ends you glued it to. If it's not dried enough, press the leather against the ends of the clip again and allow it more drying time. Start gluing on your feathers, beginning from the outer edges and working your way in. Be sure to draw even, lines of glue over the leather parts of the clip from top to bottom.
 |
| I have added the red feather. |
Step 7: Add a second layer of feathers for fullness. It's tricky to glue the second layer on. The original layer of feathers may shift. Just push them back in place. Make sure that if there are portions of the hair clip base showing that you cover those with feathers. Allow the clip about 30 minutes to dry for a bit.
|
|
| I added a layer of red feathers, and then a few black ones for decoration. |
Step 8: Allow the clip about 30 minutes to dry for a bit. Add any other embellishments you want to finish off your feather clip. In this one, I used sequins and a fancy de-shanked button. Let the clip dry COMPLETELY, usually for about 10-24 hours. Now the glue has cured and the clip is wearable. Enjoy.
|
|
| The finished product. I do recommend trimming any visible glue from the clip so it looks professional. This is just a quick hack job. The real clip looks MUCH better. |
With that all wrapped up, I should probably do the Etsy Shop of the Week... Especially since I forgot to last time.
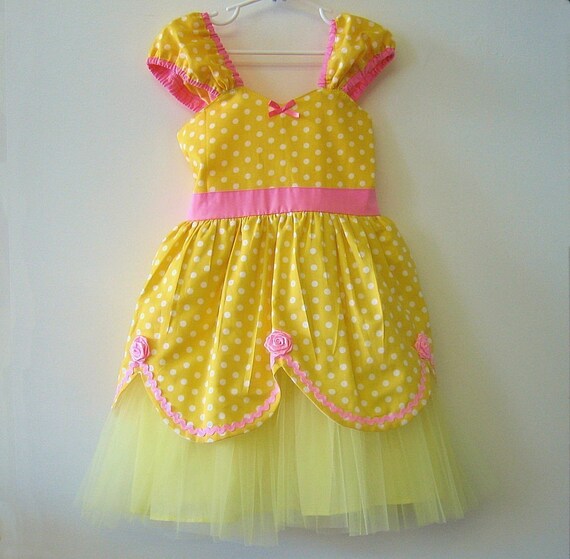
This week's feature is LoverDover's, a children's dress and adult apron shop styled after the fashions of the early 20th century! The whole shop looks like it was born in the era of 'I Love Lucy', splashed through the psychedelic colors of the 70s, and tripped into a 50's diner. I LOVE IT. This is a 'definitely' for any retro housewife and/or kitchen diva. Take a look at my choice picks!
Little Red Riding Hood Dress
 |
| Cape and Blouse are sold separately in the shop. Dress comes with a little blue apron |
I Love Lucy Apron
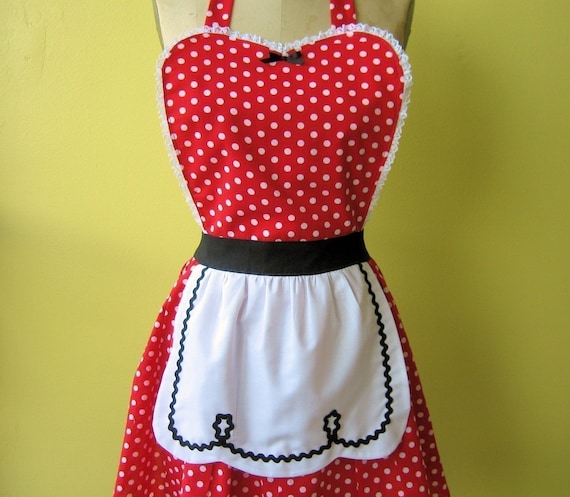 |
| Front |
Belle Princess Dress