Monday, March 21, 2011

Broaching Topics 2: I've Been Busy

I promised that I would post when I'd made more brooches, but I failed to do so.  I'm so bad.  Honestly, I haven't had an output anywhere near what I had during Holiday Bootcamp.  I've been reading and doing all sorts of non-jewelry-related activities.  Since, I've ventured away from hardcore jewelry making for the moment, I've acquired some new favorite books, the Hollows series by Kim Harrison.  I love it.  Not just because the main characters (An often clueless witch, a foul-mouthed pixy, and an angsty vampire) are well-developed and convincing as they go about their insane messed up lives, but because they inspired me.  I suppose it is because of their personalities.  I mean, it's amazing when you can grasp a person's personality so clearly that colors and shapes immediately spring to mind. 
Before I do some more reading, I'll update you on my progress with brooch-making.

Like most, I tend to start small and grow adventurous as I grasp the concepts clearly. 

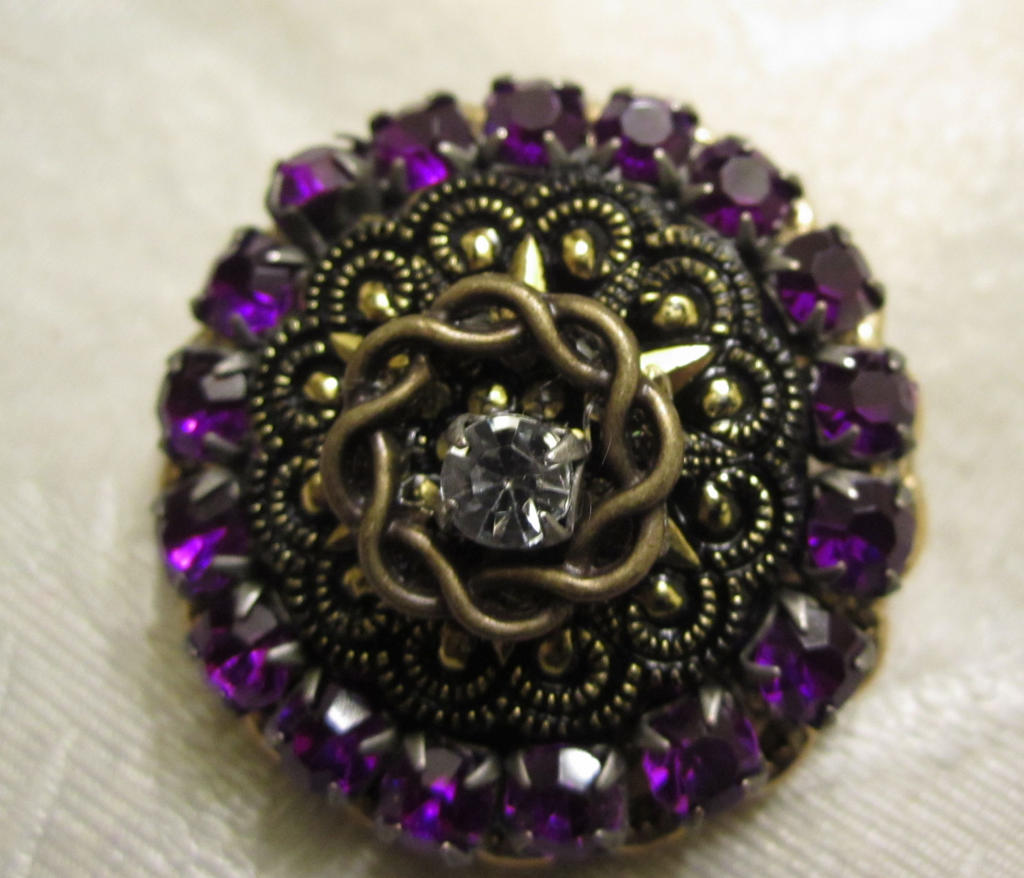
Mrs. Daisy:  Not the first I've made, but among the simplest.  The wreath and rhinestone on top are off center on purpose though.  Experimenting with Asymmetrical Designs
 In the early stages, I'm mostly using things I've seen before as an example to run with, taking abstract shapes and putting them together to see how they strike me.  Gradually I build on what I've learned and combine them with a few ideas floating in my head to create a unique aesthetic.


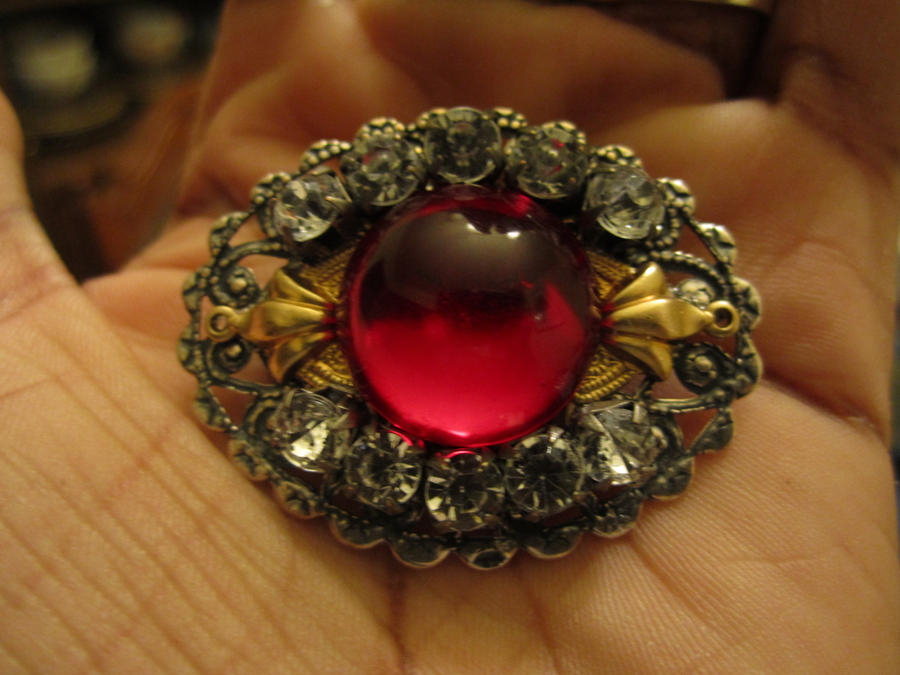
Rubicante: Traditional brooch shape, but composition inspired by a Final Fantasy Boss

Usually, I'll start tossing in a few strange or unconventional elements that are not so abstract, just to have fun, play and see how it makes me feel. 
Flapper Princess: Fun and Flippant. 
Then, after a while, I say to myself, I want to try something REALLY different.  Then I start in on something that was supposed to be small that rapidly spirals out of control as my design muse looms over my shoulder growling, "IT'S NO GOOD!!!  IT NEEDS MOOOOOOORE!!! MOOOOOOOORE!!!!!"

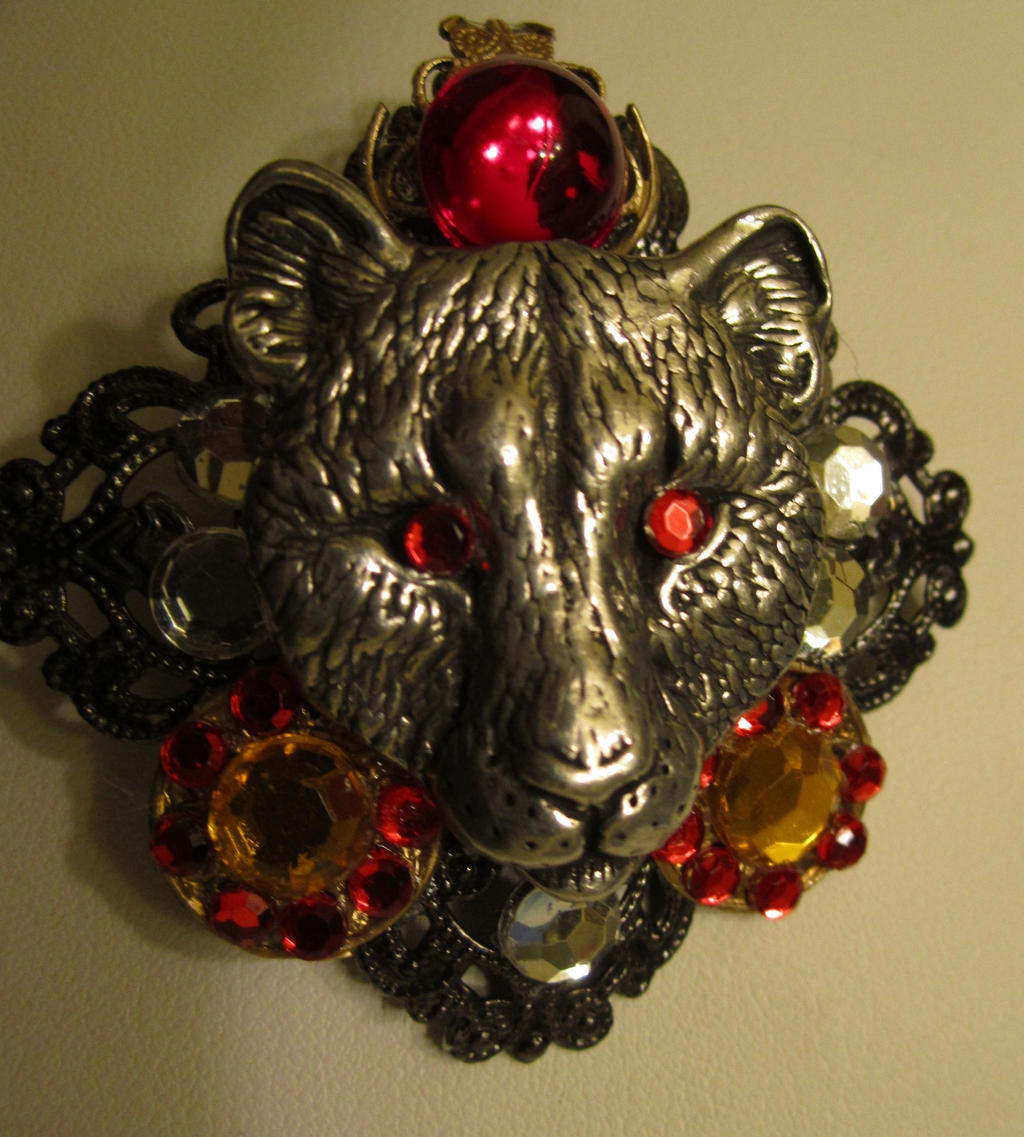
A Real Cougar:  Brought to you by the letter L, a strange sense of humor and, "MOOOOORE!"
You can check out more pictures of these brooches and MOOOOORE on my deviantart page.

Monday, March 14, 2011

Get Yourself Cuffed: The Aftermath

I think that I've been cuffed enough.  
Been buried a week in my craft stuff
Sitting around, I've gained some fluff
And now I'm in quite the huff.  
My patience is thin; don't call my bluff
Else I'll make sure YOU'RE cuffed enough

Moving on!  I'm not actually tired of making cuffs.  In fact, I just prepped some more aluminum bands, pleather, and fabric scraps for the next crop of the adorable little things.  BUT, I do need a break.  I'd just like to stop smelling E-6000 in my dreams.  Before I know it, I'll turn into an E-6000 glue mutant, hell-bent on covering the world with sparkles and rhinestones.  So, for the next couple of weeks, I'll stay away from the industrial strength adhesives as much as possible.

Before I commit to that, I have something to tell you.  I've got commissions and Requests!  Several of them!  There are a few for members of the Haute Couture Club of Chicago.  These gals want some custom pieces to go down the runway with their designs in this year's fashion show.  There are a couple for some members of my church (Already finished), and 1 logo design commission from one of my mom's followers here on Blogspot. 

After I finish my commissions- some of them include cuffs- I'll swear off the E-6000.  I swear it.  But, right now, I'm just excited.

Tuesday, March 8, 2011

Get Yourself Cuffed

Fashion is evolving!  You've got to be BOLD!  Make a statement!  Get yourself CUFFED! 


YES!!  Wait...No.  Not like that!  You're doin' it wrong!
As promised, my lovelies, a tutorial, a collection of knowledge based on my trial and error and expensive wasted art supplies, immortalized for your sakes, upon the internet.  Cue mad-scientist cackle.  I must warn you, however, that the process can be a bit messy and that most of the time you'll spend on this project shall be spent preparing your materials.  Shall we begin?

Materials
1 Unfinished Aluminum cuff blank
1 Nail File or some sandpaper (any grade)
1 Toothbrush
1 Surgical/contractor's mask
1 Pair of Goggles (high school science class type)
1 Damp Towel
E-6000 Glue
1 Pair of Latex gloves
Proper Ventilation (Fan + Open Window)
Fabric
Additional Embellishments (optional)

Instructions
1. Safety:  Make sure you have your goggles and mask fitted snugly on your face.  Open the window and turn on your fan.  Make sure the fan blows towards your work, but away from you. This is important.  Filing causes little metal flakes to become airborne.  They can get into your lungs, slice tiny microscopic holes in them and cause a lot of internal damage.  You also don't want them getting into your eyes.  Your skin will be fine though.

2.  Filing:  Begin filing your cuff blank with the sandpaper or file.  Use firm, even strokes.  I recommend a circular motion to get the most texture to your cuff without making your fingers cramp. File/Sand the inside outside, and edges of the cuff.

3.  Brush: I used a toothbrush, but a horsehair brush or a terry cloth rag will work as well.  You'll want to clean off the metal dust clinging to your newly textured cuff so that it's clean and smooth for when you work with the glue.

4.  Cut:  Measure your cuff blank.  Cut your fabric to about 1 inch + the length of the cuff and 1/2 inch + the 2 x width of your cuff.  for example, I used the 1.5 inch wide cuff bands, so I measured fabric 8 inches long and 3.5 inches wide.  This sounds unimportant or silly, but there's a reason for it. 


5.  Glue: Gluing takes place in 3 steps.  I say three steps because you'll need to pause to give the glue some time to set a little before moving on to the next one.  If you don't wait, the fabric will slide around as you try to cover the cuff.  Also, use your damp towel to clean your fingers and the cuff off in case you get glue where you don't want it to go.  This is a must.  Gluey fingerprints can RUIN a bracelet.
  1. Take your E6000 glue and make a horizontal line down the center of the back of the cuff (aka: the part that will be against your wrist when wearing).  Draw another line of glue across the top edge of the back of the cuff.  Attach the fabric to the cuff, lining up the bottom edge against the center glue line.  Smooth the fabric down evenly.  Allow the cuff to rest for 30 minutes.
  2. Draw a line of glue horizontally across the center and ALL of the edges visible at the front of the cuff.  Smooth the fabric over.  Allow the cuff to rest 30 minutes.
  3. Draw a line of glue on the bare edges on the back of the cuff.  Draw another horizontal line down the center of the cuff.  Lay the remaining fabric over the back of the bracelet and smooth it down securely against the center glue line. 
6. Finishing the Edges:  This is the part I had the most trouble with.  I tried sewing, gluing it down, and even just cutting it off.  All methods proved disastrous.  Then, I talked to someone who works with leather jewelry on deviantart.  They finish the edges of the leather with rubber sealant.  This is what you'll be doing but you'll use E-6000 glue.  Place a couple dabs of glue inside the little pocket formed by the fabric on each end of the cuff.  Try to get it as close to the actual end of the cuff blank as possible.  Fold the fabric back over.  Use your fingertips to squeeze the glue blobs like a toothpaste tube, working it towards the opening in the fabric pocket.   

7.  Allow the cuff to dry overnight, trim the excess fabric.  Embellish as you see fit.  Allow the cuff a couple more days to fully set.

8.  Wear it.

Now, Check out some Cuff bracelets that I made!


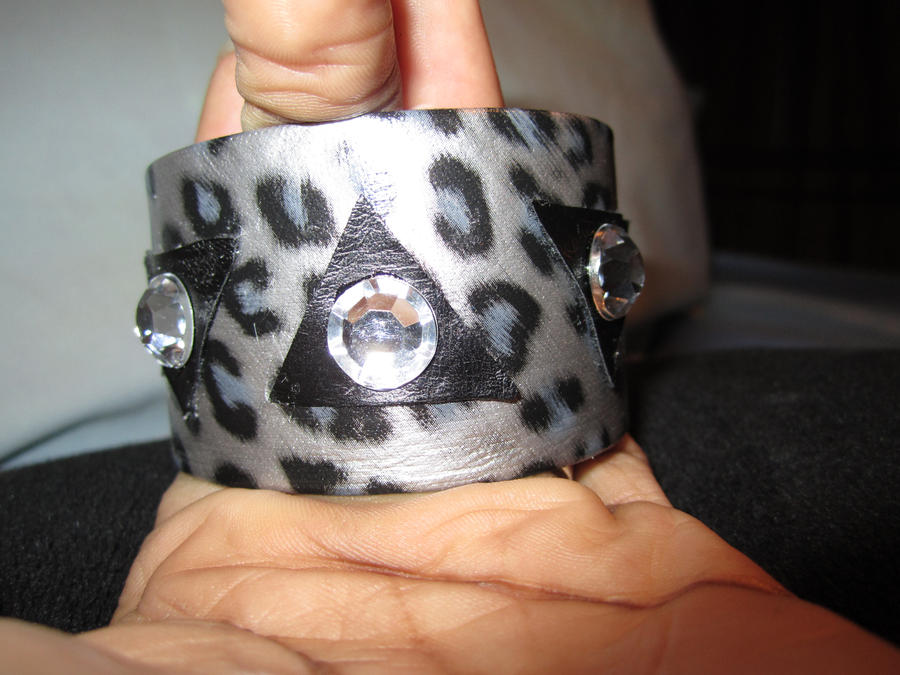
Wild Side: The very FIRST cuff I made.  Leatherette is a great starter fabric.  It's easy to work with, stays where you put it, and looks neat no matter how sloppy you were with putting it together.

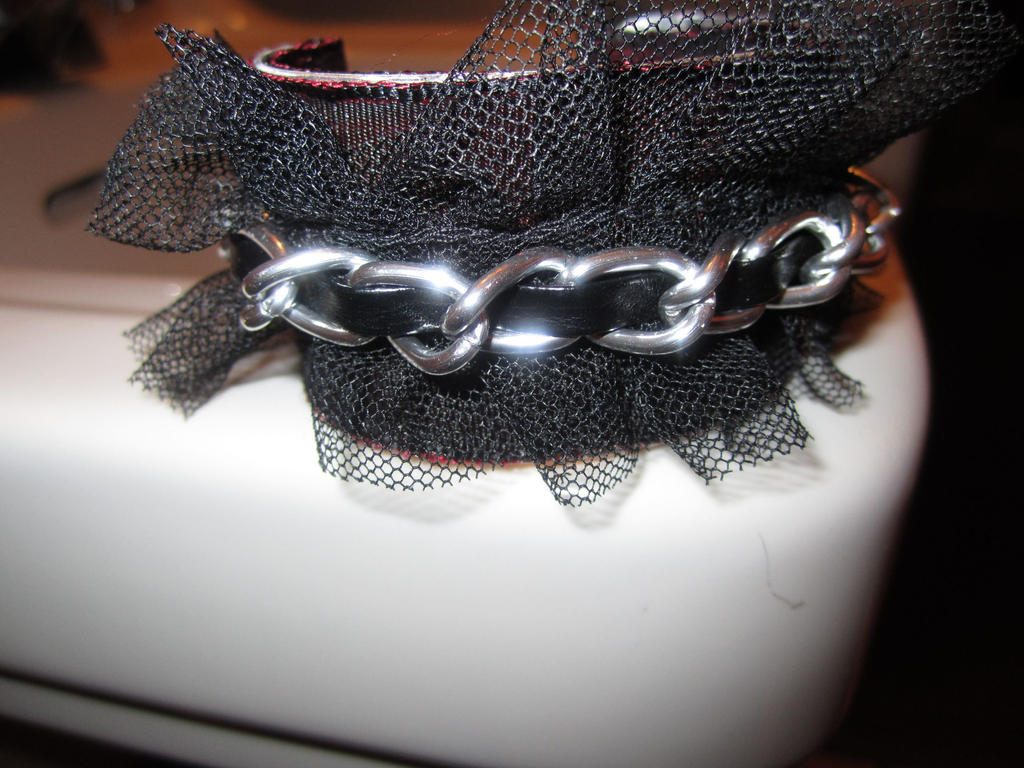
Prowl: Made with tafetta ribbon, mesh, leatherette and chain.  I was feeling adventurous.


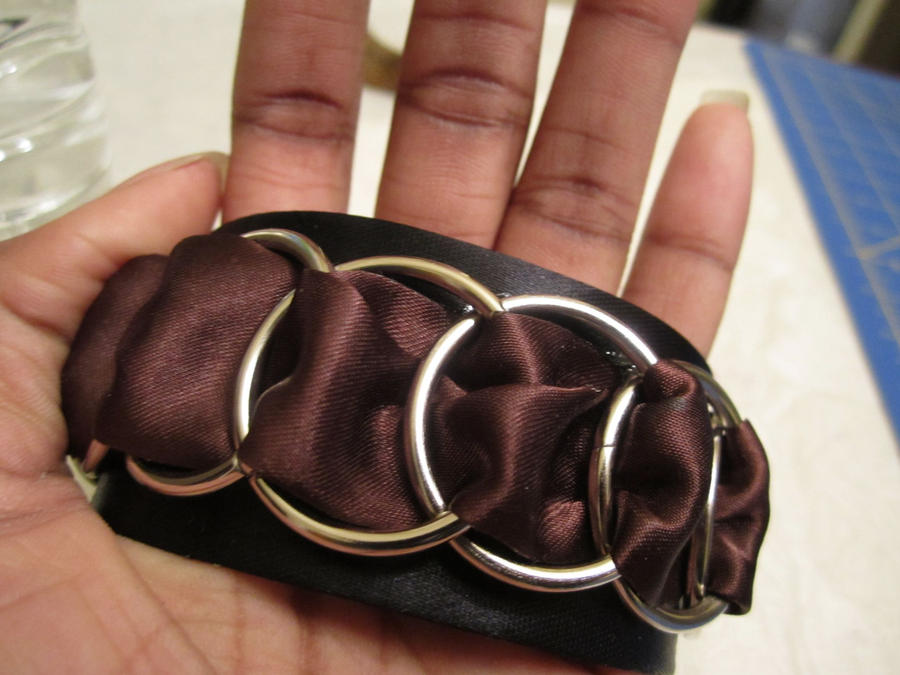
Dark Magic Cuff.  It's made with Satin, which is a beast to work with.  I had to give this one time to dry COMPLETELY before I could work with it any more.  Satin is a very temperamental fabric.

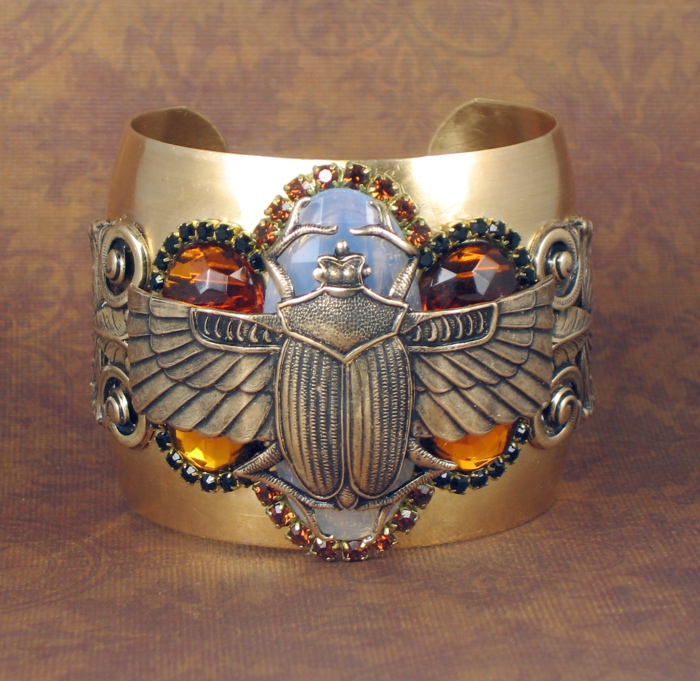
Lion Tamer: One of the best cuffs I made.  I was trying to get something more regal and classic.


Monday, March 7, 2011

The Cuff Bracelet Phenomenon

Once upon a time, it was cool to wear large afros and day-glo bell-bottoms.  Not so chic today...  Today fashion translates to 'whatever makes you happy'.  Beribboned, beruffled, and bejeweled accessories for all!
All of a sudden, I see opposing subcultures trading beauty secrets like teen girls at a sleepover.  And, they've gotten creating stellar statement pieces down to a science.  Of all that I've seen so far, my favorite is the cuff.  A cuff is a solid band formed into a bracelet.  Typically it's one or more inches wide and decorated with stamped designs, wood, filigree, or inlays.  It's versatile and timeless.
A Cuff by Beth Church. 

Every lady I've ever seen as 'classy' has at least 2 cuffs.  Since the cuff movement made a resurgence, younger women sport the thick bracelets in a variety of styles and materials.   I decided 'I gotta get me some o' that!'  For creative purposes only.  I swear.  Stop looking at me with that accusing expression!

I looked in department stores, but...  It's silly to go to a department store and pay $20+ for a poorly made cuff that isn't to your taste.  It's even more ridiculous to pay $50+ for a higher quality one.  Any self-respecting DIY addict wouldn't stand for it.  I went to my old pal the internet and queried for cuff bracelet blanks and/or tutorials.  Most of the tutorials showed you how to make a fabric cuffs that weren't polished and would disintegrate.  I'm sorry, but when I decide to put a lot of work into something, especially when it involves hand-stitching, I'd like it to be worth my while.  More wear, less tear and preferably something that can be weaponized.  A girl's got to have her priorities straight.

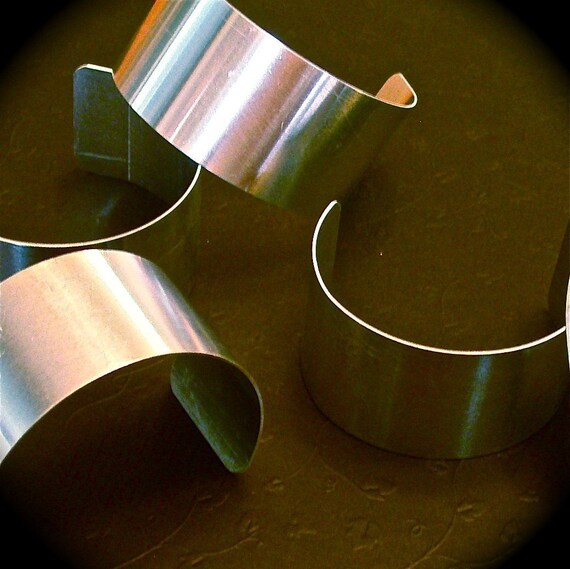
I kept searching.  What I wanted was aluminum (It's lightweight AND flexible) cuff blanks that I could cover with fabric, rhinestones or whatever else I wanted.  I found nothing.  At one point, I nearly lost hope.  The only aluminum bracelets that anyone had available were the finished, stamped and highly-polished ones and, of course, raw sheet metal, but I don't have metal working tools more sophisticated than a pair of pliers!  What could I do with sheet metal?
With proper tools and training, I could do this.
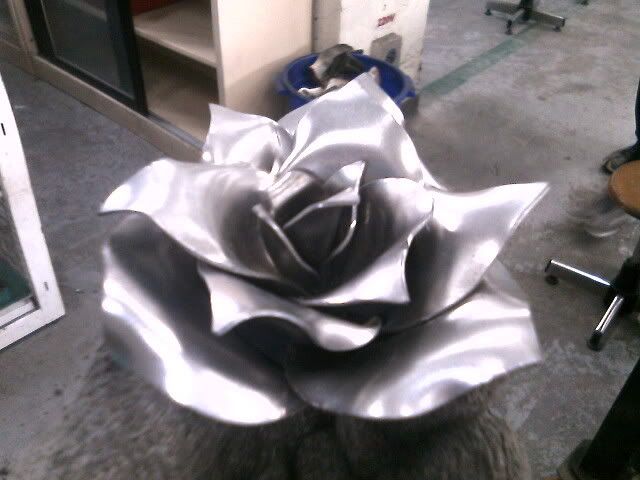
But to do that, I'd need all this...and a blowtorch.

Eventually, I stumbled on a little shop on Etsy that carried pre-cut, pre-bent, and virtually unmolested cuff blanks.  What's more, they had several sizes, ranging from 1/2'' wide to 3 inches wide (That's HUGE!).  My search had ended.  All that was left to do was to acquire the cuffs and ask the shop owner if they knew about covering cuffs with fabric.  Guess what!? ...They didn't.  They'd only ever used the cuffs for stamping and other metal-working...things, things I can't do without the above toolkit..and training...and better safety goggles.  Suddenly buying the cuffs wasn't such a great idea.  I mean, there was a chance that I'd be stuck with product that was only good for a type of jewelry-crafting for which i was ill-equipped.  Maybe I should give up, right?
Right.  Just pretend your brain squirrels went into crazy spontaneous mode.  What would THEY do?  I bet they still didn't do what mine did.  That's cause my squirrels are crazier than yours.  I bought the blasted cuffs anyway, thanked the shop owner and began experimenting.  You would not believe how many rhinestones, yards of fabric, and tubes of glue I went through before I got it right and I made beautiful little babies.  I love my little darlings!  I'll even show them to you tomorrow...BUT FIRST! 

THE ETSY SHOP OF THE WEEK!

This week's feature is the little shop where my cuff blanks were found, Gotta Get A Deal.  GGAD, features a wide range of raw aluinum products for making ornaments, dog-tags, bracelets and regular stamping supplies.  They even have colorized aluminum and solid aluminum blocks.  I've no clue where they get it, but I consider them a 'friend' because they are the only shop I've seen so far with this kind of product line.  I recommend you visit their shop if you use the tutorial I will post tomorrow.  You'll find the product selection very useful.

Wednesday, March 2, 2011

Designer Jewelry Rip-off

Everyone's had an experience like this.  You've gone into a store, seen something sparkling and beautiful (be it clothing, shoes, or jewelry) and knew in the very depths of your soul that you and it were meant to be!  ...Well, I get like this with jewelry designs.  I see a component, no matter what it may be and I feel in the very depths of my SOUL that I must CREATE the vision that's dancing in my head. 
It is this vision, this ex cathedra specter of the perfect application of your skills and materials that becomes a juggernaut of activity.  It moves and breathes from your mind to your heart, and finally to the very tips of your fingers.  The power of creation that God gave you blooms fully and completely until...until it spins itself, beautiful and whole out of your sliced and bleeding fingers, leaves you with the joyful emptiness and fatigue-stricken body of a mother after childbirth.  And then...you see someone wearing a department store knock off of your vision, a twisted and abhorrent doppleganger of your talent smashed together by soulless machines, it's uniqueness and beauty whored out for the masses at 3 times the price.  Your labor of love has been stolen, drugged and pimped out till it's not special any more.

It's a sad thing, but it happens more often than many artisans realize.  Just this weekend passed, I visited a few relatives of mine and found that one of them had bought, for $20+ a bracelet that I could have made for 5 dollars, or less.  I had all the materials in my bead box, working fingers and more than enough time to complete it for her.  Yet, it must have seemed more convenient for her to buy it while she was out shopping.  I didn't dwell on it for long, but it did hurt me. 
I vowed that instead of allowing myself to get depressed over it, I would do some scouting at these high end department stores that everyone raves about.  It was partly to make myself feel better and partly for product forecasting research.  It was my plan, actually, to rip off their designs and sell them for half the price.  I'd even planned to use it as a means of advertising.  Hey!  I made the same crap as NORDSTROM but I'll let you have it for $10 instead of $50. 
I visited their websites, looked at all they had to offer and realized that my stuff was far less expensive and... THE SAME or better than theirs.  It jarred me.  In a good way.  Instead of continuing to be sad because they had product that was beyond my scope, I was heartened.  The song 'anything you can do I can do better' played through my head and I posted some more things on my Etsy.  Suck it Nordstrom.  You and your 25 dollar bow and pearl earrings.

Nordstrom's Pearl Drops for $25
  
My Bow Dangles Earrings for $12
Dare to compare.  I mean it.  Visit my Deviantart and Nordstrom's gallery and REALLY compare it.

Wednesday, February 23, 2011

Broaching topics

The Tyrants Brooch Trio: Bathory, Vlad, Ivan


What can I say about brooches, broaches, and pins?  They are the blouse fasteners, hat pins, purse clasps and conversation pieces of the world.  But what does that have to do with me?  I make necklaces, bracelets, hair clips and earrings!  ...Well, now I do brooches too.

At first, like with many things, I was afraid of making brooches.  There was always some internal monologue holding me back from even trying.  One day, around Christmas, my friend C-note (that's what i call her because...that's what I call her), asked me to make a brooch for her to give to one of her college friends for Santa Day.  I told her 'I dunno C-note.  I've never made brooches before'.  She looked so disappointed at the news that I had to try.  You see, C-note doesn't ask for much, but she gives A LOT.  I told her that I'd do some research and call her if I could figure it out. 
I've repaired brooches, but only to the extent of getting jeweler's glue and resetting stones.  But that didn't mean I could MAKE a brooch.  I needed research.  I decided, 'What the heck!  I wanna make me some history and help out a friend while I'm at it!' and started reading about how brooches are constructed in the modern world. 
Elegante Brooch (commission)


Since I don't know how to work with leather, sewing machines, or do molten metal, I had  to go for the more mundane method of construction.  Glue.  Not that cute white glue from grade-school.  Nah.  I needed extra strength, industrial style glue.  At first I tried krazy glue.  That turned out to be a mistake.  You see, they tell you how great krazy glue is at sticking to stuff, but they don't tell you how good it is at NOT sticking to stuff.

While giving the simple brooch I made first a test drive, the whole darn thing fell apart.  Piece by piece it broke off until there was nothing but a pin back.  It was all because krazy glue dries brittle.  Something as vigorous as dropping a krazy glued jewelry item can cause the glue bonds to break. 
So, I went for my tried and true E-6000 glue!!!  It held beautifully.  Why?  Because it's literally liquid rubber.  First of all, it's sticky.  Secondly, it seeps into the pores of things contracts around them as it dries.  Thirdly, it's stretchy.  So, wiggling will not dislodge it once it has fully set. The only thing that will remove it is a knife and pliers, but ...only after an atomic explosion to loosen it up. 

Once I had got it in my head that making a brooch with the E-6000 glue isn't different from making a pendant the same way, I finished C-note's request so fast, that I made mistakes.  I had to tear it apart...and in doing so, destroyed the brooch completely.  Actually, the glue did that because it wouldn't let go.  Still, I finished the brooch.  Once it was finished, I was so excited to show her that I forgot to photograph it.  Ha! 

No worries though.  Of all the jewelry items I've learned to make, brooches are by far the easiest ones to make once you've got the design all drawn up. I'll be churning out more as I gather more materials and create new designs. 
Rosemary Brooch: Gift to Mother

Monday, January 10, 2011

Holiday Bootcamp Aftermath

After a long break for the holidays (I'm so sorry about that!  No, really I am.) I am back.  I sort of got caught up in the whole Christmas spirit and the delight that I was actually able to BUY gifts for everyone this year, rather than making them all like I've done in years passed.  Holiday bootcamp made the difference. 

Now before you protest and say something silly like 'but Agent Ren, your creations are fabulous!  Why would you have reservations about giving them as gifts?'.  The reason is simple.  Making things is what I do all the time.  That kind of takes away from the wow factor when you present someone with a piece of handmade jewelry and they already know that handmade is your thing.  The gift becomes something akin to 'the dreaded knitted sweater from grandma'. 
It's not valuable anymore.  Even if you put hours and hours into making it, it's just another lump of beads that you're forcing them to take.  Why hurt your fingers, spend scarce cash and time to just get one of those tight, uncomfortable 'I don't really want this' smiles?  I didn't break my fingers or my bank account trying to make something special this year.  I didn't agonize about not having time to make things or scraping together enough cash to get nice precious metal findings to make each item extra cool.  I hunted bargains like my life depended on it, squirreled away coupons like I was hiding seeds for winter, tracked every dollar spent with a methodical accuracy that a serial killer would envy, and had everything assembled and half-wrapped in my closet a month before Christmas. 
What's this got to do with Holiday Bootcamp?  Plenty.  I'll tell you the truth.  For all the Holiday bootcamp prep I did for a big holiday sale, I didn't sell that much, barely two c-notes worth.  I spent carefully and some would say abundantly to feed my high rate of production.  I was like a machine, grinding through eyepins, beads and time like a wood chipper and wearing out the blades on my tools twice as fast. 

I was hoping for a big breakthrough as far as sales and ended up only barely covering costs of materials.  What I did sell was stuff that people custom ordered, brooches mostly and other things that I never make en masse.  Despite this, I learned a great deal.  Here are the things that Bootcamp taught me.

1.  Run, Rest, Run:
Run, Rest, Run is the philosophy that when you do something, you go at it full tilt.  You don't burn yourself out, though, because then it'd be Run, Die and end there.  The idea is that you work like a Juggernaut until you get tired, and when you rest, you meditate ways to make your next full-tilt stint go better.  This way, when you start up, you're never starting from zero.  You're starting up from 5 because you're rested AND focused.

2.  There is always a better bargain
The problem with people is that they have a tendency to go with what they know and take the best of they see right in front of them.  You have to teach yourself not to be like any animal and make the logical choice in front of you.  You have to teach yourself to go onward.  I ran into this time and again with tried and true connectors that I have scores of.  After a while seeing the same exact elements in piece after piece makes those elements rather 'meh'.  So, I'd half-finish a set and move on to the next while I waited to find something better to finish the first.  It turned out to be a good plan.

3.  Substitutions shouldn't diminish quality
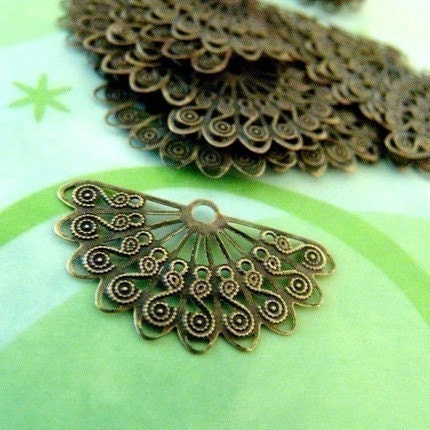
To go with the previous comment, when you're selecting new options, don't just grab any old cheapo substitute that kinda fits the description!  Go on and pay some money for the good stuff.  It's often worth it.  Otherwise, you'll be stuck with a bunch of brass fan charms thinner than tissue paper and twice as pliable... Like me. 

I don't know what I'm going to do with these things, but I haven't the heart to throw them away.

4.  Buy in bulk
If you can, buy in bulk.  Always.  I guarantee you that there will come a time when you're making something and you'll wish for some beads or findings that you've already used up.  Maybe they'll be for another necklace.  Maybe they'll be for decorating a trinket box.

5.  Keep your tools in good shape
After a lot of heavy use, it becomes obvious when your nipping pliers get dull. Things just don't cut.  They just bend and you end up with a nasty looking chewed up piece of wire, bit of a finding or something equally horrible and bad for design.

6.  If you're tired, stop working
You can't 'keep working through the pain'.  You'll end up messing up and leaving your genetic material on the thing you're working on in a way you didn't want to.

7.  No one has any originality any more.
You won't find any clients in this unstable economy that possess a lot of originality.  There is no one who will come to you with a commission knowing exactly what they want.  It's frustrating, but it's up to you to guess what they want and what they need.  You have to be ready to address the want FIRST and then, when it leads them to disaster, address the need.  Hundreds of people may look at your displays and decide that your stuff's 'not for them'.  BUT, the moment they see an item they snubbed looking great on someone else, they will want that exact item, believing that it will look the same on them.  I've no idea what dictates that logic, actually. 
However, I did have a young woman with a very short, thick neck who wanted a 3-inch wide choker made 'just like the one you wore to the Emily Autumn concert, the one posted on your deviantart', despite my attempts to lead her to a thinner 1 and a half inch wide choker band.  This same young woman was distraught when the choker folded in and got lost under her chin.  I was unsurprised, and therefore had a solution on hand.

8.  Don't waste time
This ties in to #2.  In waiting for proper items to pop up to finish a piece you've already started, don't just sit on your hands waiting for magic.  Get inspired and keep working.

9.  Double Check your work
With a a magnifying glass and tweezers.  Maybe an physicist too.

10.  Everything is Material
I used a quarter to balance out a brooch this passed weekend.  It was cheaper than buying a cabochon frame, just as effective, and twice as eye popping.  What'd you do with your quarters?  Huh?  You put them in the soda machine didn't you?

The result of applying these learnings to Christmas shopping were readily noticeable.  I didn't go into debt trying to get something I felt was 'worthy of giving'.  I also was able to get a better quality of whatever it was I gave by clipping coupons and working hard.  I played the 'How long can you keep 20 dollars' game like a pro.  Instead of squeezing those 20 dollars till they screamed, died and came back as moaning zombies, I put them to work and made them grow with careful and wise spending.  What's more, I got more laughs, screams and wails at the gifts I gave.  I even gave small gifts to clients.  Squeals of "OMFG!  THIS IS AWESOME!" rang from as far as California.  I made girls feel pretty, made moms jealous of their daughters, made muscle guys break their diets, and got to laugh at my dad because he mistakenly ate soaps that looked and smelled like oreos.  Apparently, they tasted like oreos until they started to foam up in his mouth.  Love you Dad