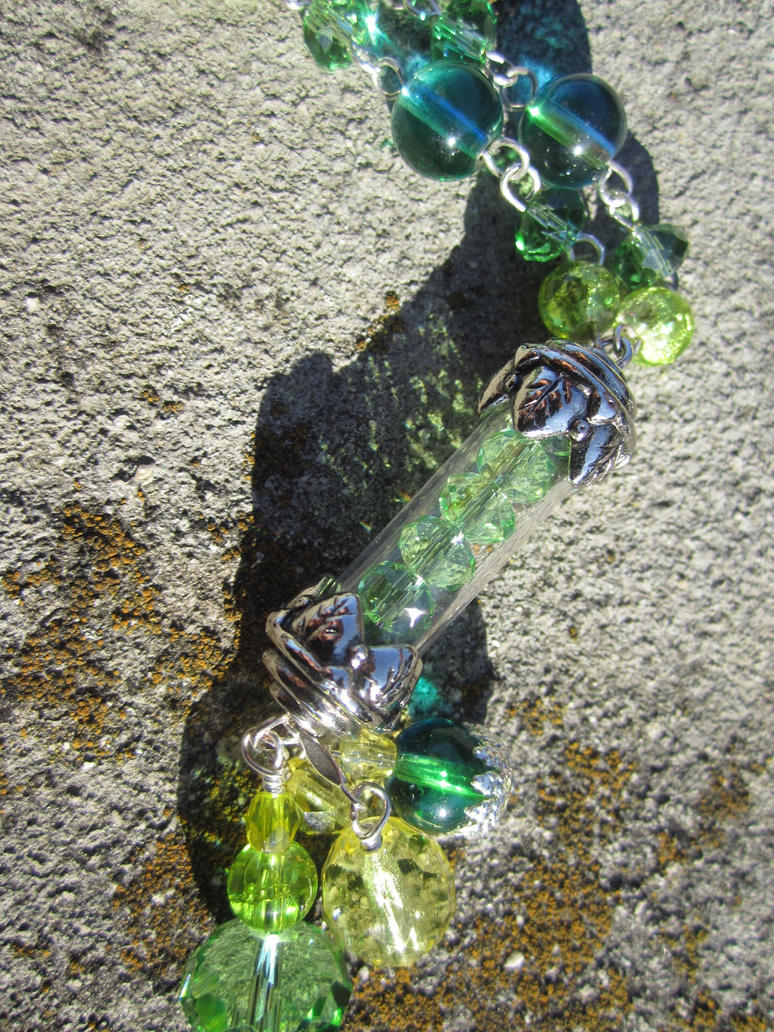
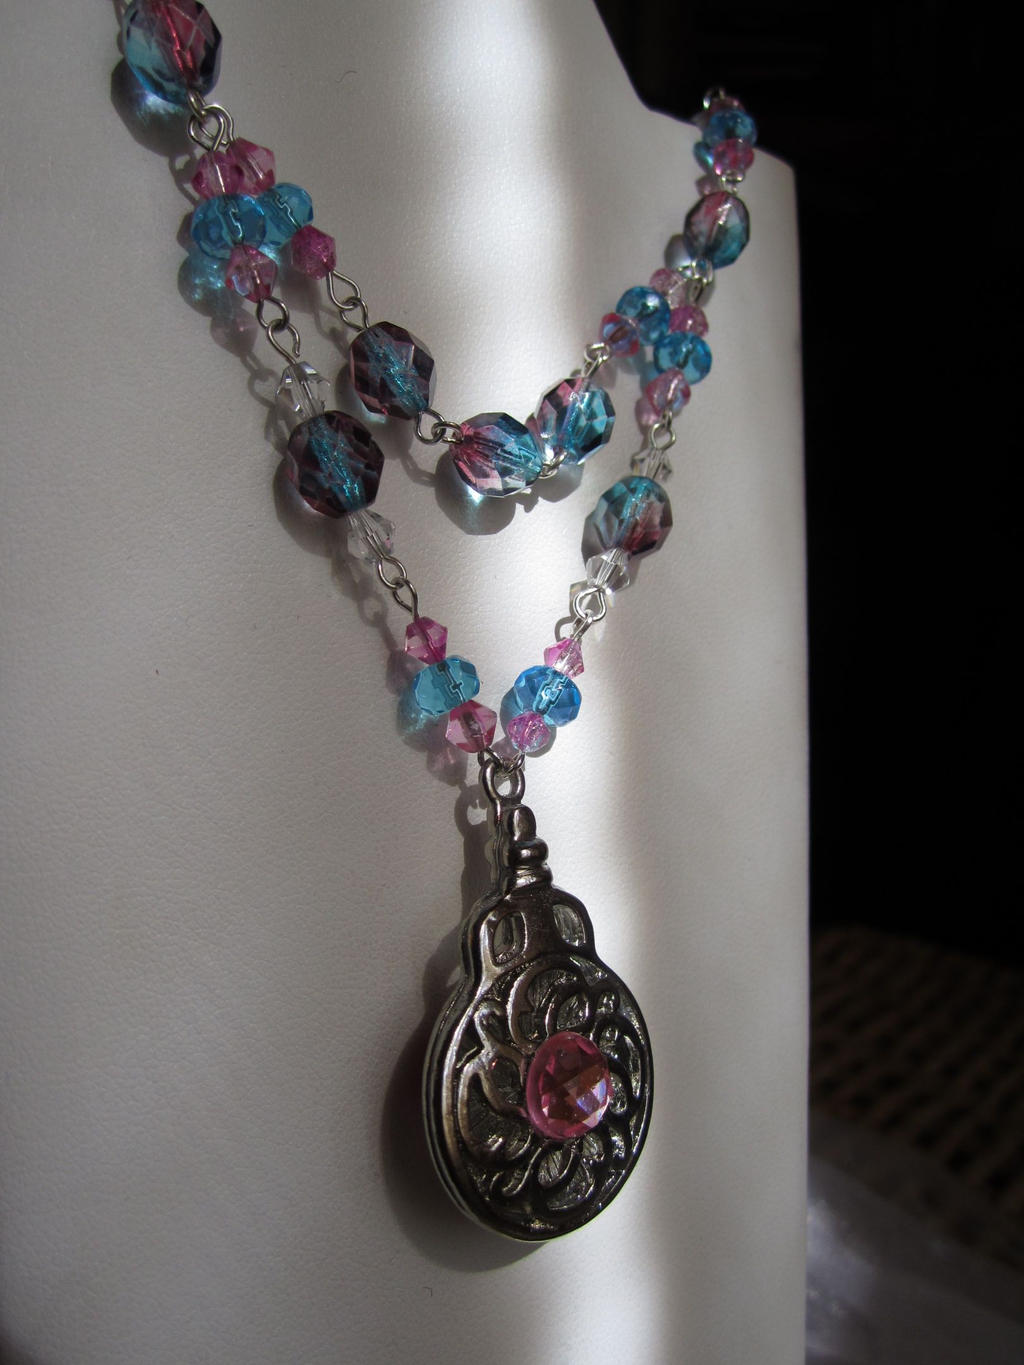
Many times, Y-styled necklaces are over looked. It's not exactly the fashion right now. However, Y-style necklaces provide some of the same benefits as a simple, long necklace, while keeping the majority of the details high up on your collarbone. It can help balance out a round, rectangular, and heart shaped faces depending on the length. This Y-style necklace I made isn't very long, so it actually works with most face types while still elongating the torso and helping you look sleek.
I went for something a bit less 'dressy' though...and added bows for cute.
I don't have many photos for it, but I did make earrings as well.
Many people find it challenging to work with muti-colored beads.
They are hard to color match, hard to match to metals, and
the array of different colors can make it difficult for artists to
settle on a single color scheme. They are for beaders and crafters what Zebra are to lions. Confusing.
More often than not, shimmery, multicolored beads are left in the clearance sections, unclaimed. But, as artists, we shouldn't let something like color and finishing stop us from using them. A multi-colored bead isn't difficult or directionless and we don't need Jesse James to tell us how to pair them. We just need a few simple steps to pull us out of the boring monotony that causes fear of the multicolored.
Focus Your Elements:
You can tailor your designs by focusing on one or two colors in the bead and expanding it into other parts of whatever piece you're making. You can take a look at my old artwork to see how this works successfully.
Forget about Matching:
It's so socially engrained in us that we need to match, that we tend to focus on it without realizing it. Always match; Don't clash. Your parents told you that you couldn't wear pink, purple and turquoise when you were little. Forget what they said. They can't tell you how to pair your beads, fabrics or clothes.
Look to Mother Nature:
Many artists take inspiration from nature. When you think nature, you think green, brown, red, orange, blue. Basic primary colors that fit only with their landscape. We often picture mother nature as some kind of middle-aged woman. SHE IS NOT. Mother Nature isn't dull, consistent or subdued. SHE IS A HARAJUKU DRAG QUEEN.
Fabulous Hunty!
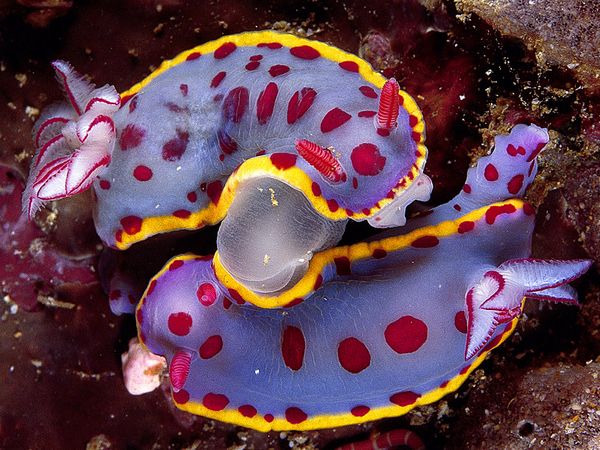
Look at the oceans, rainforests, flowers, African wildlife, and the insect world.
Check the shades of gray, turquoise, yellow, royal blue, black, green AND red.
And color isn't limited to just bugs and slugs. Take a look at this Mandril. That's sort of related to humans...distantly. So, if this primate can wear a bunch of colors, so can we.
I see purple, pink, blue, red, yellow, cream, brown, black and white...
That's about all you need to do to work with multi-colored beads and findings. Let go of your conventions and look to some new things for inspiration.
Have you ever purchased a non-patina'd piece of metal work and wondered how you could give it more depth? Or maybe you purchased some cheap electroplated resin or plastic findings and you wanted to make them look more like an expensive piece you'd pay much more for?
Anyone will tell you that a patina will add value to a piece. The aged look of metal gives it more character, even if it's a cheap piece. Patina makes a piece look more expensive and fetch a higher price. This is important if you're trying to emulate an antiqued look. Many patina tutorials I've seen so far instruct you to purchase different chemicals to speed up the aging of the metal, followed by buffing and polishing the metal so that some of its luster returns.
That's a little too tedious for me. I use a different method. It's cheap, simple and doesn't require me rubbing on a piece of metal until I get carpal tunnel. Here's what you'll need:
Black Nail Polish (I like Essie) A napkin A Q-tip Rubbing Alcohol The metal findings you want to 'patina' Clear nail polish.
That's it. Six things, most of which I'm sure you already have laying around your house. Now on to the process.
Step 1:
Clean the metal finding or bead with the alcohol using the Q-tip. You want the surface to be as free of oils and dust as possible.
My untreated findings with the Essie Nail Polish
Step 2:
Paint the metal item completely with black nail polish.
Adding the polish.
Fully Blackened
Step 3:
While the polish is still wet, gently dab off or wipe off the excess polish until it only remains in the tiny cracks and corners of the metal finding. Don't press too hard or you'll end up cleaning it all off. Allow the item to dry for a few minutes.
Add caption
Step 4:
Apply a coat of clear nail polish. This will seal the color on the metal and protect it from damage. I usually use at least 2 coats. Allow it to dry completely. I actually apply clear polish to ALL my metal findings whether I patina them or not. It protects against tarnishing and, if you have metal sensitivities, can prevent you from having a reaction.
Stringing has got to be the easiest and most ancient of all the jewelry making methods. You only need a couple of things to complete a stringing project. It's simple. Even the most primitive and ancient of cultures has strung beads of some sort. Furthermore, stringing gives rise to all other forms of beading.
Just 3 steps.
Obtain String and Bead.
Thread String Through Bead
Tie Off string.
The simplicity of strung jewelry makes the whole process VERY zen-like. You have repetitive motion, repeating patterns, and a small simple task to focus on. In no time, you have a beautiful, enchanting piece at your fingertips, like this one.
BAM! In your face! Look at those beautiful purple resin swirls!
This particular necklace is one of the few times I've used acrylics to create a jewelry piece. I tend to stay away from plastic beads because they feel kind of...cheap. However, recently, Jesse James, Darice, and Blue Moon have been producing high quality acrylic beads.
It's a simple pendant with a slightly tribal feel.
In my last post, you read about my process in creating modestly vamped up headphones. Before I show you the final design, I'll show you some of my crappy sketches of my earlier ideas for them. The process was kind of long and drawn out- more than it needed to be, since a lot of the earlier designs were impossible with the headphone's ..rather mobile design.
The ribbon I wanted to use was the wrong shade. Uck.
I abandoned this design because it reminded me of Katy Perry's Cupcake bustier.
The idea behind this one was to make it exotic and wild.
With that out of the way, I'll give you the thing you've been waiting for. The final project. Keep in mind that even with this design there were flaws. My shaky hands sometimes make it hard to get things PERFECT and even on the things I did well on, the design suffered because they don't make rhinestones the same way they used to. The foils have a tendency to warp.
I didn't realize it at the time, but the headphones were attracting lint.
Here's the final design for the ear piece. You can see how I tried to work the logo in with my design to give it a ghoulish quality and a little sparkle without it being over-powering.
Sparkles and roses.
I added sparkling ribbon to the upper headpiece to help break up all the bright acid purple. The velvet also takes care of a design flaw in the headphones themselves. They don't slip off my head if I loosen them up around my ears. I added a rose to one of the bands as well because I sort of messed up on the application of the ribbon. Learned that trick from the food network. Cover your mistakes with pretty flowers (Although, they were talking about cake.).
I'll give them another brush off before I wear them, to make sure I didn't miss any stray lint.
Overall, I'm glad with the way they turned out, even if it's not ABSOLUTELY PERFECT. I can live with it.
Uh...recently, mother and I went into Joann's to pick up some staple goods that every seamstress and jewelry maker needs to complete projects. You know, things like thread, needles, eye pins, head pins, that stuff. WELL, I discovered some really interesting findings advertised for making "trendy bracelets". They were deeply discounted. I guess people weren't too interested in gaudy rhinestones, industrial looking charms, or super quirky pendants.
Well, earlier that day my mother and I had a conversation about how people treat handmade goods like a trip to Walmart and expect 5 of everything in every color and every size -available instantly and cheaply. We also had a screech and titter about how she 'borrows' pieces to supplement her wardrobe and how I REALLY should try to make more than one of certain styles that I predict will sell well.
Not that it has anything to do with what happened at Joann's. Let's just say that because I had coupons that could be layered and I was feeling...inspired, I opted to buy doubles of...things. Shush. Forget everything you read about my excesses just a few days ago. This is for a good cause (Uh... Science!) and I don't have anything like it already, so I'm excused from judgement, ok?
That said, I immediately got to work on creating a set of near identical necklaces. The only difference between them is the number of rhinestones used.
Aegis Estuary
The semi-opaque beads seem to glow against a dark background.
Since people often ask me how I managed to 'come up with' certain techniques, color pairings, or ideas for putting things together, I will now post pictures of a rough process I used to turn what was advertised as being a bracelet into a pair of lovely necklaces.
Started with 6 inches of this- too small for a neck.
I made beaded chain in a figaro pattern, using Czech glass to highlight the crystals
Worked in the first layer of swarovskis in Capri Blue to give depth
There you have it. The first three stages of the necklaces' construction. I'm trying not to have this be one of those tutorials where they start off showing you step by step and somewhere between step 2 and 3, they forget to or explain how they get an unbelievably photo-realistic picture from two squares and a circle. Onward to the next bit.
Link the two adjacent crystals with more crystals on a parallel axis.
Repeat the process above, this time with the link beads perpendicular.
And here is where I got frustrated with constantly breaking my flow to take photos of what I was doing. I need an assistant, I think. Sadly, assistants cost money and money is in short supply. Here is the close to final product- just prior to the additional rhinestones. See how the patterns used in the previous steps are repeated until it comes to a close and is finally finished with crystalline drops and balanced along the sides with beaded chain.
A second row of opalescent crystals was added to the trapezoid beads, then a row of brass beads to draw the eye downward and balance the necklace so all the eye-grabbing shininess isn't just beneath your chin....
If you like this necklace, you can find it here in my Etsy store.
So, I'm sure you all remember the tutorial I did for Fascinators and hats not too long ago. If you don't, here it is. Well, I made that tutorial before I learned that there were other construction options available to those who don't want to devote a ton of time stitching, starching and wiring. It seems that there are pre-made hat forms with the clips already attached available from eBay. All you need to do is decorate them. Well, don't that beat all?
So now you can make a nifty fascinator in less time, gathering fewer materials and without having to use every craft skill known to man- unless you WANT to. So here you go! Hatter Madness Tutorial number 2!
Materials:
1 Mini-top hat, bowler, tricorn or high top-hat
Glue (Locktite or E6000)
Scissors
Ribbon
Some feathers
Silk flowers
Beads and other decorations
And now the instructions. You'll be surprised at how easy they are!
Instructions:
Assemble the materials you want to use.
Make a basic design arrangement for your hat.
Glue the items to the hat in an order that best balances the decor and hides any unfinished edges.
Allow it to dry completely (Very important. You don't want to super glue a hat to your head)
Ok. I've forced you guys to wait long enough. Any longer and this will read like a really bad horror movie and you'll all leave me to be swallowed by the monsters of my own making. I'm going to cut to the chase. Starting with the scarf made of jersey knit.
I gave this one to a friend. Such a pretty color!
The above scarf was less than a yard of fabric. It's comfortable, slightly stretchy and keeps your neck warm without making you too hot
Oh Starry Night!
The scarf above is actually made of a sheer woven fabric that I can't remember the origins of. I only remember that it was very pretty and it ended up in my shopping cart. I had enough fabric to make two scarves and they came out rather stylish. Since the fabric is woven, it does not stretch, but it's long enough to wear creatively and looks great with jeans and even with my hoodie.
Hello world!
I think I smiled waaaaay too big in this one.
The red scarf was made out of a SUPER STRETCHY knit of mixed fibers. I purchased it as a remnant from Vogue Fabrics on Roosevelt Road. At the time, I was thinking of making a top out of it, but when the time came to cut it out, the pattern was difficult to line up in a flattering way.... So. SCARF! The fabric's drape and body lends itself nicely to the look of elegance.
The final scarf!
I actually made three of these. I bought the fabric at Vogue, on sale. It is a grey, black, and white stretch knit with little hairs all over it. The weave is kind of open, so it breathes and keeps you relatively cool. However, the scarf is VERY arm. This fabric is the only fabric that I bought with the sole purpose of turning it into a scarf . I was planning to try out infinity scarves on a day when I was tired of applying to jobs all day, so I wanted a fabric similar to the kind I saw used in the expensive scarves at Carson's. I found it at Vogue. And here we are.
Special thanks to my mother for taking the photos. I couldn't have done it without you.
Infinity scarves are awesome, right? On average, a good infinity scarf can cost between 15-40 dollars. Depending on the materials and where you look they can cost even more. Some of them cost over $300 dollars! If you don't believe me, check out the Diane von Furstenberg website and don't forget to catch your chin before it hits the desk. Infinity scarfs are incredible, versatile little accessories. Of course, they cost a lot of money. They must be hard to make.
Well, there's a trick in there. They actually aren't hard to make. To me, the real value of the infinity scarf is in the materials that comprises it. Since it's so simple, I figured it out on my own. To be sure, my mom and I both had been looking for an easy project to get rid of scraps. Every sewer LOVES to get rid of scraps.
Like many sewers, I like good knit fabric with rich colors and simple, but bold patterns.
It's great for making tops, arm warmers, and the like. However, I
locate my best materials in the remnant room. All coiled up, a remnant of fabric can look like much more than it
is. And when you get it home, it's stained, there was a glitch in the
pattern, or it's torn in an odd place. So, in effect, you've got a nice knit fabric that will either lead to a very long game of sewing table Tetris or a big pile of disappointingly large scraps.
I don't sew that much and I have a ridiculous stash already. I needed to make use of my scraps and pieces of fabric that are just big enough to get you into trouble. Turning it into a collection of infinity scarves was the best solution.
Here are the steps I followed to turn my fabric into something worth while.
Step 1: Cut and Measure
You need to decide how long and how wide you want your scarf. The trick I used to determine a regular length for my scarves follows the rules of necklace length. There are 6 main necklace lengths.
Borrowed from Jewellerygem.com
When applied to an infinity scarf it can change the way you wear it and increase its versatility. I chose to have my Infinity Scarves fall at about 40- 45 inches. There were two reasons I chose this length. 1. It gives you enough room to loop it around a few times and use it as a cowl if it gets blustery. 2. It's a common fabric width, enabling you to reduce raveling as you handle the ends of it because the very end of the fabric is actually the selvage.
I made my scarf widths between 8 and 12 inches. Some of the materials I used were on the thick side and it wouldn't be a good idea to make the scarves wider because the end result would probably accidentally choke someone. Save the wider scarf widths for thinner materials.
Step 2: Stitch, Turn, Stitch
This is the easy part. Fold the fabric lengthwise, with the 'good side' facing inward. Stitch one seam down the cut ends of the fabric. I used a serger because the fabric I used were fuzzy and needed to be contained.
Next, Turn the scarf right side out, so your seam allowance isn't visible.
Finally, pin the seams together so you can start sewing the two ends of the scarf together without twisting it up. Sew the ends together so that the seam allowances will be inside the scarf. Since your scarf currently forms a little cylinder, you can't just sew straight across or sew it completely closed. Leave about 2 inches open.
Step 3: Blind stitch
Finally, I close up my infinity scarf by blind stitching that hole closed. It doesn't take long, about 5 minutes including needle threading time. Once it's done, you've got a nice infinity scarf to go flouncing around in. Easy huh?
For those of you who are more kinetically inclined, check out this gal's sweet youtube video.
I was surprised how much her tutorial matched my method. I am glad I found it though.
Finally! My next post will include my infinity scarf creations!
You've all gotten the memo, seen the trend, heard the buzz... Get it? Buzz?
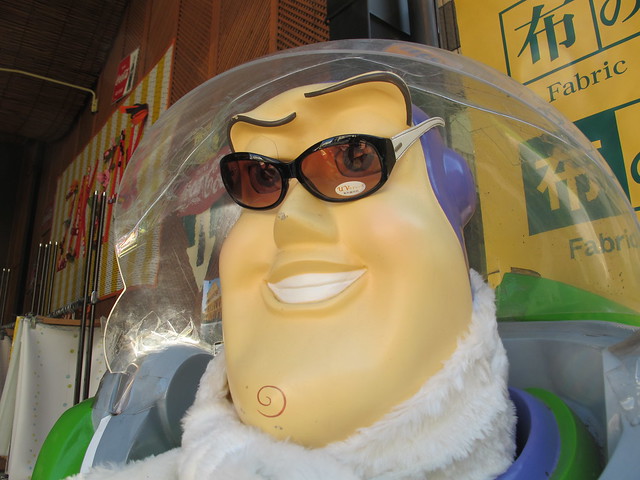
Courtesy of Samm Bennett's Flickr
Yes that's Buzz Lightyear wearing a scarf. Even he knows that scarves are the in thing right now. They have scarves for all seasons: thick, thin, sheer, opaque, bandana styled, ascots, regular old scarf scarves and even Infinity Scarves. No. Not scarves times infinity, but a specific style of scarf that forms a continuous loop.
The Infinity Scarf is a versatile fashion accessory that can comes in a variety of widths, lengths, colors and materials. You can do just about anything with an infinity scarf. It's continuous loop design keeps it from slipping from your neck and enables you to adapt it to suit your needs. You can wear it as a cowl, layer it around your neck like a regular scarf, loop it over your
head like an opera length necklace, cross tie it around your body to
make a comfy beach top and even use it to tie up small children.
Courtesy of Pinterest
Simply by changing up your accessories and how you position the scarf, your infinity scarf could act as other garments you wear regularly. Belts, vests, cardigans, shawls. You name it.
Check out this video where SecretLifeOfaBioNerd shows us how to wear a wide infinity scarf 21 different ways.
The other great thing about infinity scarves is that they are so, SO easy to make on your own. With that said, I'll conclude this post by announcing that I will be posting a brief infinity scarf tutorial in a day or two and that I MAY run a contest. Keep your eyes and ears open!
Working retail over the holidays kept me busy and tired, so I didn't go to many parties. Let's face it, you're not going to be raising the roof with your girls if your feet hurt so bad you start thinking it might be better to live as an amputee. No parties for me.
Knowing that I couldn't attend the Christmas shindigs or even stay in my own house to watch old Christmas movies really stung, so I was determined to make Christmas Eve fun for me- by making a hat. An ostentatious, LED lit marvel of amateur hat-making science.
This baby.
Let me start by first saying this: I had no idea what I was doing. This hat is something made purely on a whim, with no prior experience besides making hair clips. It also, very quickly, became an experiment to see how much stuff I could cram onto one small oval piece of felt without breaking my neck or having it fall off my head. Despite this, I think it came out nicely.
I had no pattern to help in making this so I sort of followed my own mind. It was actually fairly simple to make once I had assembled all the materials. I'll include pictures of the less common ones.
Materials:
Two sheets of craft felt
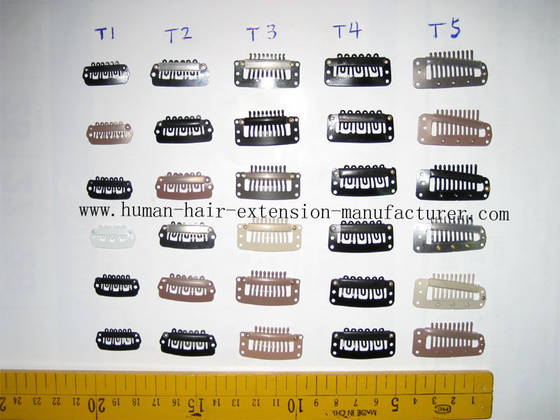
Two Hair extension combs
Hair Extension Combs: Photo From Human Hair Extension Manufacturer.com
Beads (Any will do)
Hem Tape
Garland
I used something similar to this
LED tea light
Christmas Trimmings
Scissors
Wire
Instructions:
1. Cut the felt into ovals. They will be your hat base.
2. Mark where you want to place the combs (it's important that they're
opposite one another otherwise it will fall off your head) Hand sew
them to one of the felt ovals.
3. Assemble your Christmas Trimmings (I got most of mine from the dollar
store). Determine the basic layout you want them in before sewing or
gluing them down.
4. Hand sew or glue (E6000 for the win!) your Christmas Trimmings to the other oval of felt. I wanted a light on my hat so I had to cut a hole so that I could reach the switch. I also wired a little golden Christmas tree light cover to it so the naked LED bulb wasn't showing.
5. Hand sew the two felt ovals to one another, making sure the combs and decorations aren't sandwiched between the felt layers.
6. Measure the perimeter of the felt ovals, and cut the wire to that length plus 2 inches. Twist the ends of the wire over it to secure them so they don't poke you in the head, then shape it to fit in your felt ovals.
7. Hand sew one side of the hem tape to one side of your felt oval. Fold the hem tape to the other side of the felt oval, tuck the wire in the fold, begin sewing the other side of the hem tape to your hat base, keeping the wire oval inside the pocket formed by the hem tape. Complete a full circuit around your hat, knot the thread, tuck the end into a hidden spot under the hat and wear.
Yesterday, mom and I got off to a strange start, with her asking me to make sure I scrubbed the pan from the baked chicken breasts I'd made to put over salads (I should probably post that recipe.) Of course, at the time, I was in my room on the phone with an admissions counselor for a university offering courses that would lead me to a job, certifications, and licenses to mentor, teach, and tutor special ed students as a real job. I couldn't answer her question about that stupid pan!
Of course, she came to my door with that patented expression of maternal annoyance and, 'you'd better not be ignoring me!' I pantomimed that I was on the phone and this sparked a whole conversation in silent, expressive gesturing, silly faces and random pointing to objects. She went back to her laptop to mind the queue for work, granting me enough time to finish with the adviser.
When I exited my room to clean that pan, I wasn't the happiest camper. College is expensive. Universities are expensive. Graduate degrees, even when you're taking all your coursework online, are even more expensive than the four years you spend in a university getting your bachelor's degree. Even with the scholarships I was eligible for, I still wouldn't be able to afford school without incurring EVEN more student loan debt and I also wouldn't have the cushion of a part-time job helping with my expenses.
Naturally, my mother's mom sense was tingling! She asked me what was wrong and I started weeping all over the place. "Stop that crying!" She said. I was too busy being upset with all my short-comings and unemployed status to actually think about what she was really saying. Since we've reached this point where we can seriously talk to each other, she explained herself.
School is expensive- you know that.
Jobs are hard to come by- you know that too.
That job you had wasn't a good fit for you- You were always uncertain of your performance what you were being asked to do. You recognized that.
It doesn't mean that you're broken or that there is nothing out there for you.
It doesn't mean that you can't find a good or a better job now that it's over.
It just means, you have more time to analyze yourself, to grow into a better and stronger person, and to expand on your strengths.
Don't worry about things. Stop being sad. It hurts me when you're sad.
This whole little speech/laundry list of how I should be conducting myself was both uplifting and made me feel a little guilty. While I was being sad and making ugly faces, I was troubling my mom AND preventing myself from recognizing what's actually good for me. Jobs are a means to an end, that end being, self-actualization, financial security and overall happiness.
If it is not creating one or more of those ends, it's not worth what you put in. If it marginalizes your existence, your loves, and your self-esteem, it is completely worthless. Sobbing over it is also worthless. Dwelling on what might have been and what you could have done and why you weren't able to be Office Jesus will block out the room you need to seize your real blessings. Thanks mom. You're the queen.
I gotta remember this next time I get a application rejection letter.
Once upon a time, it was cool to wear large afros and day-glo bell-bottoms. Not so chic today... Today fashion translates to 'whatever makes you happy'. Beribboned, beruffled, and bejeweled accessories for all!
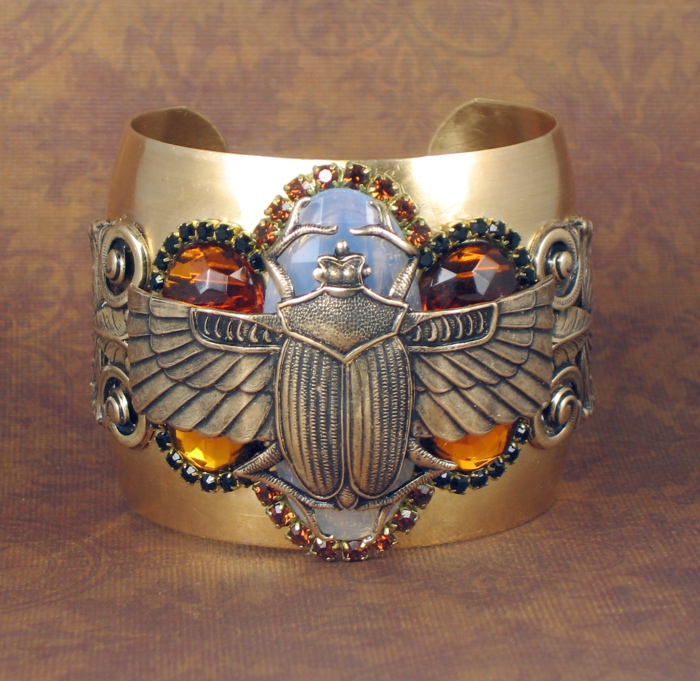
All of a sudden, I see opposing subcultures trading beauty secrets like teen girls at a sleepover. And, they've gotten creating stellar statement pieces down to a science. Of all that I've seen so far, my favorite is the cuff. A cuff is a solid band formed into a bracelet. Typically it's one or more inches wide and decorated with stamped designs, wood, filigree, or inlays. It's versatile and timeless.
A Cuff by Beth Church.
Every lady I've ever seen as 'classy' has at least 2 cuffs. Since the cuff movement made a resurgence, younger women sport the thick bracelets in a variety of styles and materials. I decided 'I gotta get me some o' that!' For creative purposes only. I swear. Stop looking at me with that accusing expression!
I looked in department stores, but... It's silly to go to a department store and pay $20+ for a poorly made cuff that isn't to your taste. It's even more ridiculous to pay $50+ for a higher quality one. Any self-respecting DIY addict wouldn't stand for it. I went to my old pal the internet and queried for cuff bracelet blanks and/or tutorials. Most of the tutorials showed you how to make a fabric cuffs that weren't polished and would disintegrate. I'm sorry, but when I decide to put a lot of work into something, especially when it involves hand-stitching, I'd like it to be worth my while. More wear, less tear and preferably something that can be weaponized. A girl's got to have her priorities straight.
I kept searching. What I wanted was aluminum (It's lightweight AND flexible) cuff blanks that I could cover with fabric, rhinestones or whatever else I wanted. I found nothing. At one point, I nearly lost hope. The only aluminum bracelets that anyone had available were the finished, stamped and highly-polished ones and, of course, raw sheet metal, but I don't have metal working tools more sophisticated than a pair of pliers! What could I do with sheet metal?
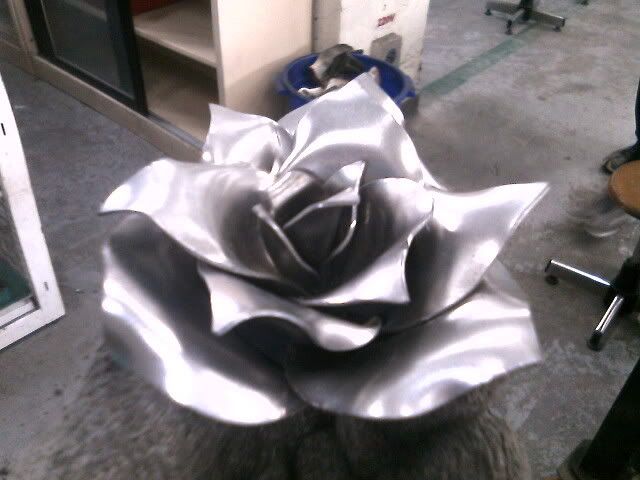
With proper tools and training, I could do this.
But to do that, I'd need all this...and a blowtorch.
Eventually, I stumbled on a little shop on Etsy that carried pre-cut, pre-bent, and virtually unmolested cuff blanks. What's more, they had several sizes, ranging from 1/2'' wide to 3 inches wide (That's HUGE!). My search had ended. All that was left to do was to acquire the cuffs and ask the shop owner if they knew about covering cuffs with fabric. Guess what!? ...They didn't. They'd only ever used the cuffs for stamping and other metal-working...things, things I can't do without the above toolkit..and training...and better safety goggles. Suddenly buying the cuffs wasn't such a great idea. I mean, there was a chance that I'd be stuck with product that was only good for a type of jewelry-crafting for which i was ill-equipped. Maybe I should give up, right?
Right. Just pretend your brain squirrels went into crazy spontaneous mode. What would THEY do? I bet they still didn't do what mine did. That's cause my squirrels are crazier than yours. I bought the blasted cuffs anyway, thanked the shop owner and began experimenting. You would not believe how many rhinestones, yards of fabric, and tubes of glue I went through before I got it right and I made beautiful little babies. I love my little darlings! I'll even show them to you tomorrow...BUT FIRST!
THE ETSY SHOP OF THE WEEK!
This week's feature is the little shop where my cuff blanks were found, Gotta Get A Deal. GGAD, features a wide range of raw aluinum products for making ornaments, dog-tags, bracelets and regular stamping supplies. They even have colorized aluminum and solid aluminum blocks. I've no clue where they get it, but I consider them a 'friend' because they are the only shop I've seen so far with this kind of product line. I recommend you visit their shop if you use the tutorial I will post tomorrow. You'll find the product selection very useful.