Many times, Y-styled necklaces are over looked. It's not exactly the fashion right now. However, Y-style necklaces provide some of the same benefits as a simple, long necklace, while keeping the majority of the details high up on your collarbone. It can help balance out a round, rectangular, and heart shaped faces depending on the length. This Y-style necklace I made isn't very long, so it actually works with most face types while still elongating the torso and helping you look sleek.
I went for something a bit less 'dressy' though...and added bows for cute.
I don't have many photos for it, but I did make earrings as well.
Showing posts with label Tutorial. Show all posts
Monday, May 5, 2014
Friday, May 2, 2014
A Simple Necklace
Often times we overlook the benefits of simple pendants and necklaces, especially today with the rise in the popularity of loud, statement necklaces. Your necklace of charms and shiny dangles isn't always appropriate with your outfits. Take drape neck tops for example. You can't wear statement necklaces with those... Lace stuff. No statement necklaces with that. It's too much. You need simple things with a focus on one or two elements. Like this necklace for example.
I kept it simple. There isn't even a whole lot of beaded chain. Another good thing about this necklace is the long chain. That way if you have an embellished neckline, this will draw the attention evenly down your body and help to elongate your torso. Long necklaces make you look slender. Grab a long necklace with a detail rich focal to make yourself look sleek and sophisticated.
| The devil is in the details of the pendant! |
I kept it simple. There isn't even a whole lot of beaded chain. Another good thing about this necklace is the long chain. That way if you have an embellished neckline, this will draw the attention evenly down your body and help to elongate your torso. Long necklaces make you look slender. Grab a long necklace with a detail rich focal to make yourself look sleek and sophisticated.
Wednesday, April 23, 2014
Enter the Multiverse: Using Multicolored and Iridescent Beads
Many people find it challenging to work with muti-colored beads.
They are hard to color match, hard to match to metals, and
the array of different colors can make it difficult for artists to
settle on a single color scheme. They are for beaders and crafters what Zebra are to lions. Confusing.
More often than not, shimmery, multicolored beads are left in the clearance sections, unclaimed. But, as artists, we shouldn't let something like color and finishing stop us from using them. A multi-colored bead isn't difficult or directionless and we don't need Jesse James to tell us how to pair them. We just need a few simple steps to pull us out of the boring monotony that causes fear of the multicolored.
Focus Your Elements:
You can tailor your designs by focusing on one or two colors in the bead and expanding it into other parts of whatever piece you're making. You can take a look at my old artwork to see how this works successfully.
Forget about Matching:
It's so socially engrained in us that we need to match, that we tend to focus on it without realizing it. Always match; Don't clash. Your parents told you that you couldn't wear pink, purple and turquoise when you were little. Forget what they said. They can't tell you how to pair your beads, fabrics or clothes.
Look to Mother Nature:
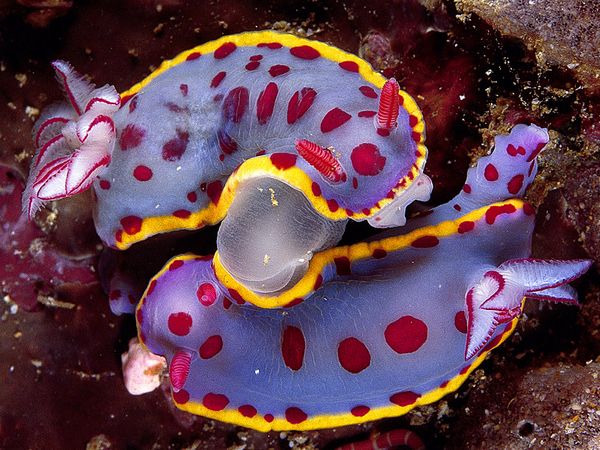
Many artists take inspiration from nature. When you think nature, you think green, brown, red, orange, blue. Basic primary colors that fit only with their landscape. We often picture mother nature as some kind of middle-aged woman. SHE IS NOT. Mother Nature isn't dull, consistent or subdued. SHE IS A HARAJUKU DRAG QUEEN.
Look at the oceans, rainforests, flowers, African wildlife, and the insect world.
And color isn't limited to just bugs and slugs. Take a look at this Mandril. That's sort of related to humans...distantly. So, if this primate can wear a bunch of colors, so can we.
That's about all you need to do to work with multi-colored beads and findings. Let go of your conventions and look to some new things for inspiration.
More often than not, shimmery, multicolored beads are left in the clearance sections, unclaimed. But, as artists, we shouldn't let something like color and finishing stop us from using them. A multi-colored bead isn't difficult or directionless and we don't need Jesse James to tell us how to pair them. We just need a few simple steps to pull us out of the boring monotony that causes fear of the multicolored.
Focus Your Elements:
You can tailor your designs by focusing on one or two colors in the bead and expanding it into other parts of whatever piece you're making. You can take a look at my old artwork to see how this works successfully.
Forget about Matching:
It's so socially engrained in us that we need to match, that we tend to focus on it without realizing it. Always match; Don't clash. Your parents told you that you couldn't wear pink, purple and turquoise when you were little. Forget what they said. They can't tell you how to pair your beads, fabrics or clothes.
Look to Mother Nature:
Many artists take inspiration from nature. When you think nature, you think green, brown, red, orange, blue. Basic primary colors that fit only with their landscape. We often picture mother nature as some kind of middle-aged woman. SHE IS NOT. Mother Nature isn't dull, consistent or subdued. SHE IS A HARAJUKU DRAG QUEEN.
| Fabulous Hunty! |
| Check the shades of gray, turquoise, yellow, royal blue, black, green AND red. |
And color isn't limited to just bugs and slugs. Take a look at this Mandril. That's sort of related to humans...distantly. So, if this primate can wear a bunch of colors, so can we.
| I see purple, pink, blue, red, yellow, cream, brown, black and white... |
That's about all you need to do to work with multi-colored beads and findings. Let go of your conventions and look to some new things for inspiration.
Friday, April 11, 2014
Faux Patina Tutorial
Have you ever purchased a non-patina'd piece of metal work and wondered how you could give it more depth? Or maybe you purchased some cheap electroplated resin or plastic findings and you wanted to make them look more like an expensive piece you'd pay much more for?
Anyone will tell you that a patina will add value to a piece. The aged look of metal gives it more character, even if it's a cheap piece. Patina makes a piece look more expensive and fetch a higher price. This is important if you're trying to emulate an antiqued look. Many patina tutorials I've seen so far instruct you to purchase different chemicals to speed up the aging of the metal, followed by buffing and polishing the metal so that some of its luster returns.
That's a little too tedious for me. I use a different method. It's cheap, simple and doesn't require me rubbing on a piece of metal until I get carpal tunnel. Here's what you'll need:
Black Nail Polish (I like Essie)
A napkin
A Q-tip
Rubbing Alcohol
The metal findings you want to 'patina'
Clear nail polish.
That's it. Six things, most of which I'm sure you already have laying around your house. Now on to the process.
Step 1:
Clean the metal finding or bead with the alcohol using the Q-tip. You want the surface to be as free of oils and dust as possible.
Step 2:
Paint the metal item completely with black nail polish.
Step 3:
While the polish is still wet, gently dab off or wipe off the excess polish until it only remains in the tiny cracks and corners of the metal finding. Don't press too hard or you'll end up cleaning it all off. Allow the item to dry for a few minutes.
Step 4:
Apply a coat of clear nail polish. This will seal the color on the metal and protect it from damage. I usually use at least 2 coats. Allow it to dry completely. I actually apply clear polish to ALL my metal findings whether I patina them or not. It protects against tarnishing and, if you have metal sensitivities, can prevent you from having a reaction.
That's all! Tadaaaaa!
Anyone will tell you that a patina will add value to a piece. The aged look of metal gives it more character, even if it's a cheap piece. Patina makes a piece look more expensive and fetch a higher price. This is important if you're trying to emulate an antiqued look. Many patina tutorials I've seen so far instruct you to purchase different chemicals to speed up the aging of the metal, followed by buffing and polishing the metal so that some of its luster returns.
That's a little too tedious for me. I use a different method. It's cheap, simple and doesn't require me rubbing on a piece of metal until I get carpal tunnel. Here's what you'll need:
Black Nail Polish (I like Essie)
A napkin
A Q-tip
Rubbing Alcohol
The metal findings you want to 'patina'
Clear nail polish.
That's it. Six things, most of which I'm sure you already have laying around your house. Now on to the process.
Step 1:
Clean the metal finding or bead with the alcohol using the Q-tip. You want the surface to be as free of oils and dust as possible.
| My untreated findings with the Essie Nail Polish |
Step 2:
Paint the metal item completely with black nail polish.
| Adding the polish. |
| Fully Blackened |
Step 3:
While the polish is still wet, gently dab off or wipe off the excess polish until it only remains in the tiny cracks and corners of the metal finding. Don't press too hard or you'll end up cleaning it all off. Allow the item to dry for a few minutes.
| Add caption |
Step 4:
Apply a coat of clear nail polish. This will seal the color on the metal and protect it from damage. I usually use at least 2 coats. Allow it to dry completely. I actually apply clear polish to ALL my metal findings whether I patina them or not. It protects against tarnishing and, if you have metal sensitivities, can prevent you from having a reaction.
| The completed Faux Patina |
That's all! Tadaaaaa!
| TADAAAA! |
Wednesday, February 26, 2014
Hors d'oeuvre: Stuffed Cucumbers
It's been a while since my friends and I had a party. Naturally, with people enduring various life changes just weeks before Valentine's Day (Which was a Friday this year), we took advantage of it to celebrate, commemorate and memorialize. No celemoratorialization cermony would complete without comfort foods and a full spread.
Since it had been a while, we decided to expand on what we usually do. DECORATIONS! FANCY hors d'oevres! FLOWERS!
We did it potluck style, as is our usual. I was in charge of the vegetable based appetizer. Oddly enough, I was at a loss. I wanted to make kale and tomatoes- but that would have been messy to transport and a veggie platter was LAME. I had to come up with something finger friendly, but still kind of awesome. As we were browsing for decorations in party city, I was inspired to pull this one out of thin air.
Stuffed Cucumbers.
Ingredients:
Cucumbers (I'm not posting a picture of a cucumber. You guys should know what that is by now.)
Boursin (Or Goat Cheese)
Cream Cheese
Greek Herbs (Or Spinach dip mix)
Siracha- or any hot sauce
Tomato Sauce.
Tools:
Knife
Melon Baller
Potato Peeler
Whisk
Instructions:
1. Prep your cucumbers! I always wash them with soap and warm water because, that oily wax stuff that they put on them in the grocery store is disgusting. Once clean, slice off their ends and use the potato peeler to slice the skin off in stripes. I left some of the skin on for decorative effect.
2. Prep your cucumbers some more! Next, you slice them into 1.5 inch long cylinders. It's ok if it's not exact, but if you're putting them all on the same platter, it looks better if they are about the same size. Next, use the melon baller to scoop out the cucumber middles. DO NOT scoop it all the way down to the bottom of the cucumber. You want them to look like little cups. Arrange them in the platter and put them in the fridge while you prep the rest of the dish. You don't want soggy cucumbers.
3. Blend your cheeses and herbs with the whisk until smooth. It is unfortunate that I do not measure as I mix, but this one's easy. For whatever amount of goat cheese and herbs or Boursin you use, add half that amount of cream cheese. The cream cheese is mostly there to make the mixture SMOOTH and creamy. I added additional herbs to pump up the flavor. Once the cheese mixture is smooth, put it into a ziplock bag.
4. Blend your hot sauce or siracha with a couple teaspoons of tomato sauce. That's a nobrainer. I had to add tomato sauce to avoid roasting my Polish friend's tonsils out.
5. FILL THE CUPS! Take your cucumbers from the fridge. Drip a small dollop of the hot sauce mixture into each cup, just a little bit, not a lot. Then, take that ziplock bag of cheese, snip off a corner and use it to pipe the cheese into the cups. It's best to swirl it into the cups, working from the outer edges towards the middle. It works up quickly. Once finished, you may choose to garnish the tops of your cucumbers with a bit of red pepper or pickled vegetable.
AND YOU ARE DONE. That took what? 20-30 minutes tops?
![]() |
| Here you see all the things girls need to survive: Sparkles, Carbs, Chocolate, Pizza, Cake, Fruit, and Veggies, and Flowers |
We did it potluck style, as is our usual. I was in charge of the vegetable based appetizer. Oddly enough, I was at a loss. I wanted to make kale and tomatoes- but that would have been messy to transport and a veggie platter was LAME. I had to come up with something finger friendly, but still kind of awesome. As we were browsing for decorations in party city, I was inspired to pull this one out of thin air.
Stuffed Cucumbers.
Ingredients:
Cucumbers (I'm not posting a picture of a cucumber. You guys should know what that is by now.)
Boursin (Or Goat Cheese)
Cream Cheese
Greek Herbs (Or Spinach dip mix)
Siracha- or any hot sauce
Tomato Sauce.
| I bought boursin because I didn't feel like prepping my own spinach and artichokes. |
| We didn't have siracha, so I used hot sauce. It works. |
Knife
Melon Baller
Potato Peeler
Whisk
| Just Three tools! |
Instructions:
1. Prep your cucumbers! I always wash them with soap and warm water because, that oily wax stuff that they put on them in the grocery store is disgusting. Once clean, slice off their ends and use the potato peeler to slice the skin off in stripes. I left some of the skin on for decorative effect.
2. Prep your cucumbers some more! Next, you slice them into 1.5 inch long cylinders. It's ok if it's not exact, but if you're putting them all on the same platter, it looks better if they are about the same size. Next, use the melon baller to scoop out the cucumber middles. DO NOT scoop it all the way down to the bottom of the cucumber. You want them to look like little cups. Arrange them in the platter and put them in the fridge while you prep the rest of the dish. You don't want soggy cucumbers.
| SEE, cups! |
| Arrange them attractively in a platter. |
4. Blend your hot sauce or siracha with a couple teaspoons of tomato sauce. That's a nobrainer. I had to add tomato sauce to avoid roasting my Polish friend's tonsils out.
5. FILL THE CUPS! Take your cucumbers from the fridge. Drip a small dollop of the hot sauce mixture into each cup, just a little bit, not a lot. Then, take that ziplock bag of cheese, snip off a corner and use it to pipe the cheese into the cups. It's best to swirl it into the cups, working from the outer edges towards the middle. It works up quickly. Once finished, you may choose to garnish the tops of your cucumbers with a bit of red pepper or pickled vegetable.
AND YOU ARE DONE. That took what? 20-30 minutes tops?
| Enjoy with a light, fruity wine. |
Saturday, February 8, 2014
Craft Supplies: The Gift That Keeps Giving Part Two
In my last post, you read about my process in creating modestly vamped up headphones. Before I show you the final design, I'll show you some of my crappy sketches of my earlier ideas for them. The process was kind of long and drawn out- more than it needed to be, since a lot of the earlier designs were impossible with the headphone's ..rather mobile design.
With that out of the way, I'll give you the thing you've been waiting for. The final project. Keep in mind that even with this design there were flaws. My shaky hands sometimes make it hard to get things PERFECT and even on the things I did well on, the design suffered because they don't make rhinestones the same way they used to. The foils have a tendency to warp.
Here's the final design for the ear piece. You can see how I tried to work the logo in with my design to give it a ghoulish quality and a little sparkle without it being over-powering.
I added sparkling ribbon to the upper headpiece to help break up all the bright acid purple. The velvet also takes care of a design flaw in the headphones themselves. They don't slip off my head if I loosen them up around my ears. I added a rose to one of the bands as well because I sort of messed up on the application of the ribbon. Learned that trick from the food network. Cover your mistakes with pretty flowers (Although, they were talking about cake.).
Overall, I'm glad with the way they turned out, even if it's not ABSOLUTELY PERFECT. I can live with it.
![]() |
| The ribbon I wanted to use was the wrong shade. Uck. |
![]() |
| I abandoned this design because it reminded me of Katy Perry's Cupcake bustier. |
![]() |
| The idea behind this one was to make it exotic and wild. |
With that out of the way, I'll give you the thing you've been waiting for. The final project. Keep in mind that even with this design there were flaws. My shaky hands sometimes make it hard to get things PERFECT and even on the things I did well on, the design suffered because they don't make rhinestones the same way they used to. The foils have a tendency to warp.
| I didn't realize it at the time, but the headphones were attracting lint. |
| Sparkles and roses. |
| I'll give them another brush off before I wear them, to make sure I didn't miss any stray lint. |
Overall, I'm glad with the way they turned out, even if it's not ABSOLUTELY PERFECT. I can live with it.
Friday, February 7, 2014
Craft Supplies: The Gift That Keeps Giving.
For Christmas, one of my friends sent me a pair of Skullcandy headphones. Another of my friends gave me a ton of glass beads and really intricate charms. I needed new headphones and, as a crafter, I always need new beads and charms. The charms were a great deal smaller than anything I'm using right now, so I was brainstorming ideas for them when it dawned on me that I could use them for a trendy craft project.
In stores, I've been seeing all kinds of heavily decorated headphones, blinged out ear buds and other music enjoyment paraphenalia. As much as I'd love a pair of earbuds that look like sushi rolls, bat shaped Mp3 covers, or a set of sparkly cupcake headphones, I can't see the point in buying them. Typically, these things cost a lot of money and are poor quality. Why should I pay $30 bucks for a pair of pretty headphones that sound like tin cans in a bag? So, it became my mission to vamp up my headphones. By vamp-up, I mean...
It's actually pretty easy to decorate a pair of headphones, once you know how you kind of design you want to follow and what shapes you have to work with. To get you started on your own DIY decorated headphones, here's a rough tutorial of how I modestly upgraded mine with just a few tidbits of craft supplies. To vamp-up, sweeten, or bling your own headphones, you'll ALWAYS need the following:
Headphones (Duh)
E6000 glue
Ribbon (I chose a velvety sparkling kind)
Fabric or Leather scraps
Charms and Rhinestones
A Color Scheme
I made a rough plan of what I wanted to do with them before I even got started. Skullcandy is NOT cheap and it would have been horrible if I messed them up permenantly. I started my design by examining my headphones to see what parts of their external plastic would be easy to decorate without compromising their ability to function.
Remember kids, just because you can decorate something, doesn't mean you should. There's a reason they don't have a market for rhinestone exhaust plugs for your tailpipes.
After inspection, I started to make stencils of the parts I intended to create decoration arrangements for. This is important because it helps you get your placement down before you mess up anything.
After I'd drafted a stencil to use, I brainstormed how I wanted to dress them up further. I was able to narrow down what sorts of charms would work best with the current design of the headphones, where they would go and how I could tentatively line them up. Since I already like the Skullcandy logo, I decided that I wouldn't cover it up.
I didn't really want anything TOO outrageous. Just a little glimmer here and there, you know? I traced my stencil for the sides of the headphones onto some scrap leather, then cut it out and glued it where it belonged. I continued gluing things down according to the plan until the headphones were finished. You'll see a final design on my next post- Tomorrow.
MWAHAHAHA!
| Come to Momma. |
| Maila Nurmi- Vampira |
Headphones (Duh)
E6000 glue
Ribbon (I chose a velvety sparkling kind)
Fabric or Leather scraps
Charms and Rhinestones
A Color Scheme
I made a rough plan of what I wanted to do with them before I even got started. Skullcandy is NOT cheap and it would have been horrible if I messed them up permenantly. I started my design by examining my headphones to see what parts of their external plastic would be easy to decorate without compromising their ability to function.
| They're PURPLE! Maybe I could work that into the design somewhere. |
| I spy with my little eye, a vestigial screw-port. |
Remember kids, just because you can decorate something, doesn't mean you should. There's a reason they don't have a market for rhinestone exhaust plugs for your tailpipes.
After inspection, I started to make stencils of the parts I intended to create decoration arrangements for. This is important because it helps you get your placement down before you mess up anything.
| First I roughly traced the half circle onto some paper, then checked it against the headphones to ensure accuracy... |
| Then I 'doubled' the half circle with a vent cut out for the movable stems on the ear-pieces. |
After I'd drafted a stencil to use, I brainstormed how I wanted to dress them up further. I was able to narrow down what sorts of charms would work best with the current design of the headphones, where they would go and how I could tentatively line them up. Since I already like the Skullcandy logo, I decided that I wouldn't cover it up.
| Scrap leather from an old coat. A bit of the old lining still clings to it. |
I didn't really want anything TOO outrageous. Just a little glimmer here and there, you know? I traced my stencil for the sides of the headphones onto some scrap leather, then cut it out and glued it where it belonged. I continued gluing things down according to the plan until the headphones were finished. You'll see a final design on my next post- Tomorrow.
MWAHAHAHA!
Labels:
Creative Process,
Friends,
Gifts,
Goth,
Motivation,
Projects,
Reviews,
Tutorial
Friday, January 24, 2014
New Necklace
Uh...recently, mother and I went into Joann's to pick up some staple goods that every seamstress and jewelry maker needs to complete projects. You know, things like thread, needles, eye pins, head pins, that stuff. WELL, I discovered some really interesting findings advertised for making "trendy bracelets". They were deeply discounted. I guess people weren't too interested in gaudy rhinestones, industrial looking charms, or super quirky pendants.
Well, earlier that day my mother and I had a conversation about how people treat handmade goods like a trip to Walmart and expect 5 of everything in every color and every size -available instantly and cheaply. We also had a screech and titter about how she 'borrows' pieces to supplement her wardrobe and how I REALLY should try to make more than one of certain styles that I predict will sell well.
Not that it has anything to do with what happened at Joann's. Let's just say that because I had coupons that could be layered and I was feeling...inspired, I opted to buy doubles of...things. Shush. Forget everything you read about my excesses just a few days ago. This is for a good cause (Uh... Science!) and I don't have anything like it already, so I'm excused from judgement, ok?
That said, I immediately got to work on creating a set of near identical necklaces. The only difference between them is the number of rhinestones used.
Since people often ask me how I managed to 'come up with' certain techniques, color pairings, or ideas for putting things together, I will now post pictures of a rough process I used to turn what was advertised as being a bracelet into a pair of lovely necklaces.
There you have it. The first three stages of the necklaces' construction. I'm trying not to have this be one of those tutorials where they start off showing you step by step and somewhere between step 2 and 3, they forget to or explain how they get an unbelievably photo-realistic picture from two squares and a circle. Onward to the next bit.
And here is where I got frustrated with constantly breaking my flow to take photos of what I was doing. I need an assistant, I think. Sadly, assistants cost money and money is in short supply. Here is the close to final product- just prior to the additional rhinestones. See how the patterns used in the previous steps are repeated until it comes to a close and is finally finished with crystalline drops and balanced along the sides with beaded chain.
If you like this necklace, you can find it here in my Etsy store.
Well, earlier that day my mother and I had a conversation about how people treat handmade goods like a trip to Walmart and expect 5 of everything in every color and every size -available instantly and cheaply. We also had a screech and titter about how she 'borrows' pieces to supplement her wardrobe and how I REALLY should try to make more than one of certain styles that I predict will sell well.
Not that it has anything to do with what happened at Joann's. Let's just say that because I had coupons that could be layered and I was feeling...inspired, I opted to buy doubles of...things. Shush. Forget everything you read about my excesses just a few days ago. This is for a good cause (Uh... Science!) and I don't have anything like it already, so I'm excused from judgement, ok?
That said, I immediately got to work on creating a set of near identical necklaces. The only difference between them is the number of rhinestones used.
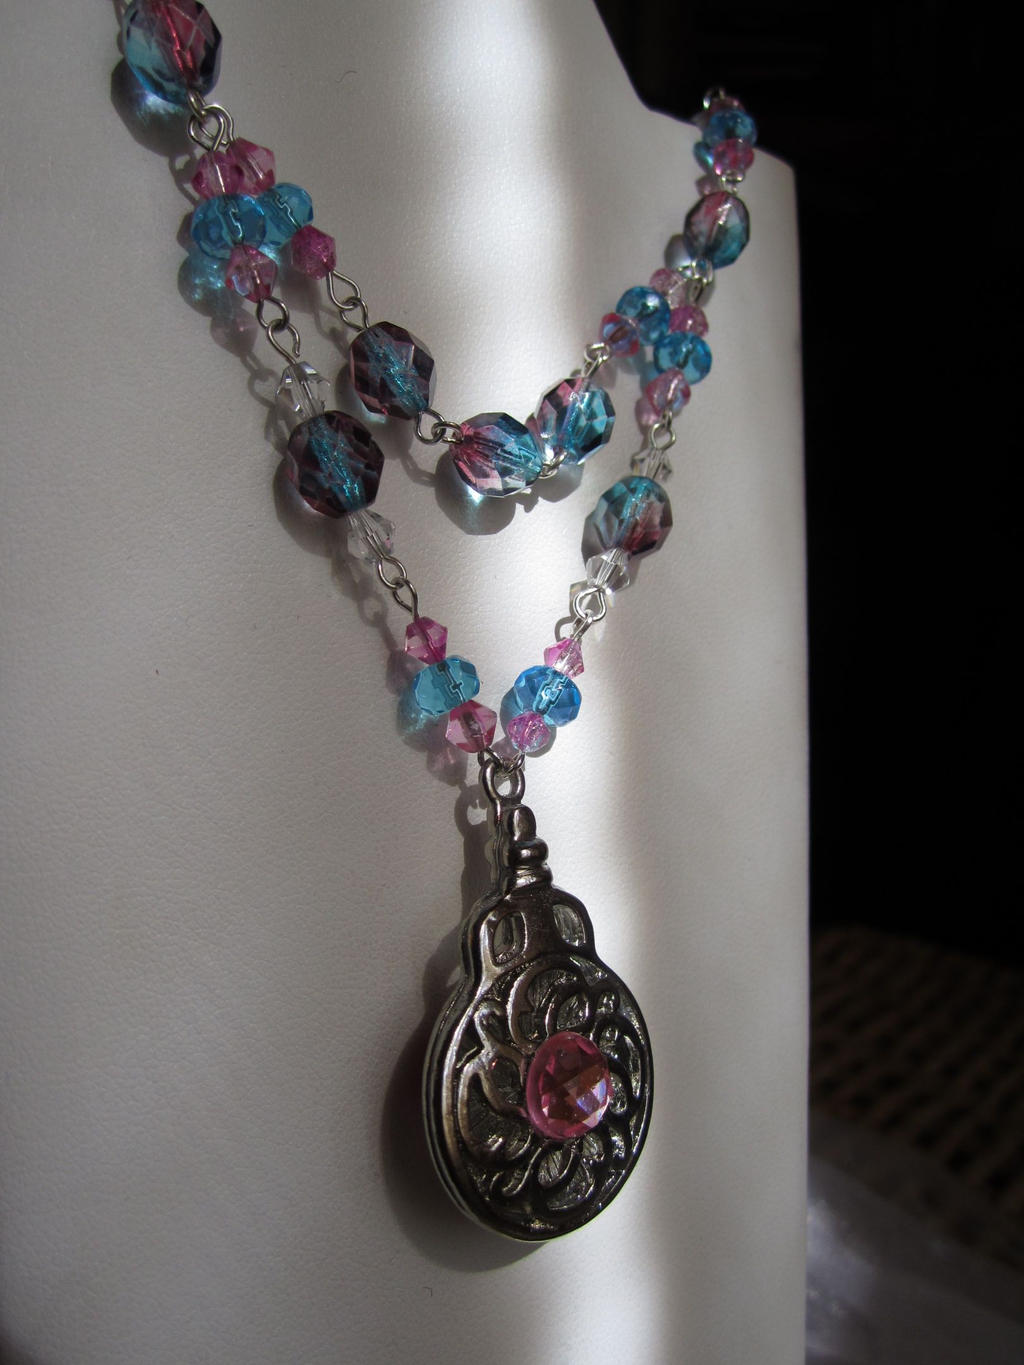
| Aegis Estuary |
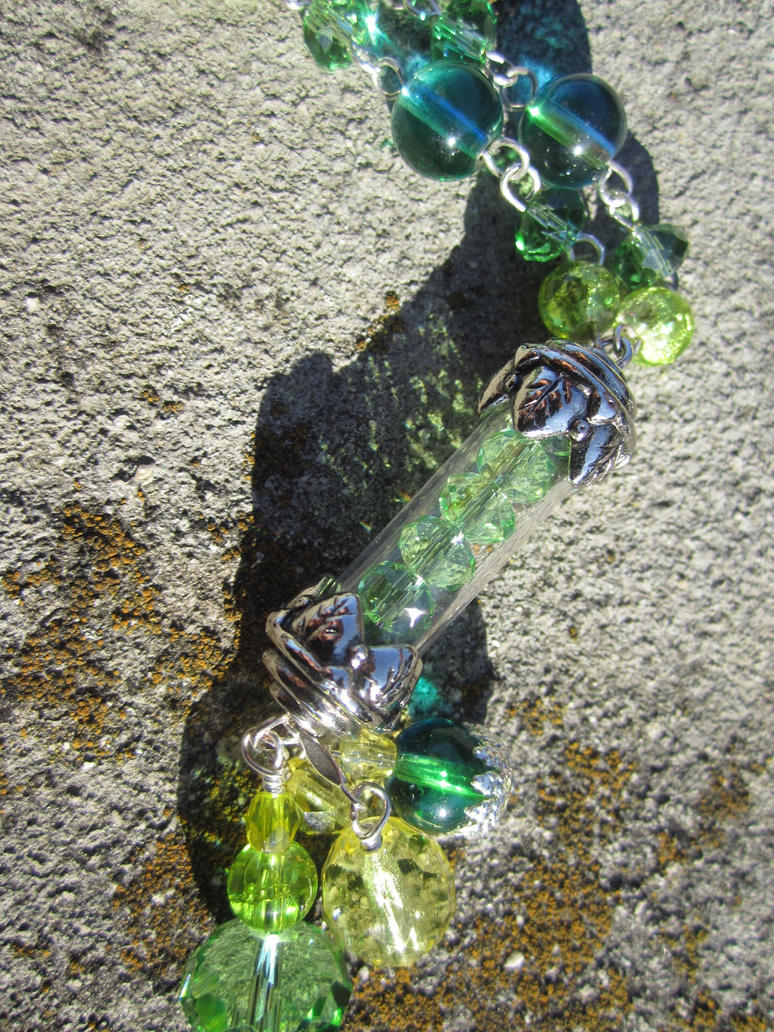
| The semi-opaque beads seem to glow against a dark background. |
Since people often ask me how I managed to 'come up with' certain techniques, color pairings, or ideas for putting things together, I will now post pictures of a rough process I used to turn what was advertised as being a bracelet into a pair of lovely necklaces.
| Started with 6 inches of this- too small for a neck. |
| I made beaded chain in a figaro pattern, using Czech glass to highlight the crystals |
| Worked in the first layer of swarovskis in Capri Blue to give depth |
| Link the two adjacent crystals with more crystals on a parallel axis. |
| Repeat the process above, this time with the link beads perpendicular. |
And here is where I got frustrated with constantly breaking my flow to take photos of what I was doing. I need an assistant, I think. Sadly, assistants cost money and money is in short supply. Here is the close to final product- just prior to the additional rhinestones. See how the patterns used in the previous steps are repeated until it comes to a close and is finally finished with crystalline drops and balanced along the sides with beaded chain.
If you like this necklace, you can find it here in my Etsy store.
Saturday, February 2, 2013
Hatter Madness: Tutorial 2
So, I'm sure you all remember the tutorial I did for Fascinators and hats not too long ago. If you don't, here it is. Well, I made that tutorial before I learned that there were other construction options available to those who don't want to devote a ton of time stitching, starching and wiring. It seems that there are pre-made hat forms with the clips already attached available from eBay. All you need to do is decorate them. Well, don't that beat all?
So now you can make a nifty fascinator in less time, gathering fewer materials and without having to use every craft skill known to man- unless you WANT to. So here you go! Hatter Madness Tutorial number 2!
Materials:
And now the instructions. You'll be surprised at how easy they are!
Instructions:
So now you can make a nifty fascinator in less time, gathering fewer materials and without having to use every craft skill known to man- unless you WANT to. So here you go! Hatter Madness Tutorial number 2!
Materials:
- 1 Mini-top hat, bowler, tricorn or high top-hat
- Glue (Locktite or E6000)
- Scissors
- Ribbon
- Some feathers
- Silk flowers
- Beads and other decorations
And now the instructions. You'll be surprised at how easy they are!
Instructions:
- Assemble the materials you want to use.
- Make a basic design arrangement for your hat.
- Glue the items to the hat in an order that best balances the decor and hides any unfinished edges.
- Allow it to dry completely (Very important. You don't want to super glue a hat to your head)
- Wear it.
Friday, February 1, 2013
To Infinity and Beyond: Part Three! Scarves!
Ok. I've forced you guys to wait long enough. Any longer and this will read like a really bad horror movie and you'll all leave me to be swallowed by the monsters of my own making. I'm going to cut to the chase. Starting with the scarf made of jersey knit.
The above scarf was less than a yard of fabric. It's comfortable, slightly stretchy and keeps your neck warm without making you too hot
The scarf above is actually made of a sheer woven fabric that I can't remember the origins of. I only remember that it was very pretty and it ended up in my shopping cart. I had enough fabric to make two scarves and they came out rather stylish. Since the fabric is woven, it does not stretch, but it's long enough to wear creatively and looks great with jeans and even with my hoodie.
The red scarf was made out of a SUPER STRETCHY knit of mixed fibers. I purchased it as a remnant from Vogue Fabrics on Roosevelt Road. At the time, I was thinking of making a top out of it, but when the time came to cut it out, the pattern was difficult to line up in a flattering way.... So. SCARF! The fabric's drape and body lends itself nicely to the look of elegance.
I actually made three of these. I bought the fabric at Vogue, on sale. It is a grey, black, and white stretch knit with little hairs all over it. The weave is kind of open, so it breathes and keeps you relatively cool. However, the scarf is VERY arm. This fabric is the only fabric that I bought with the sole purpose of turning it into a scarf . I was planning to try out infinity scarves on a day when I was tired of applying to jobs all day, so I wanted a fabric similar to the kind I saw used in the expensive scarves at Carson's. I found it at Vogue. And here we are.
Special thanks to my mother for taking the photos. I couldn't have done it without you.
| I gave this one to a friend. Such a pretty color! |
| Oh Starry Night! |
| Hello world! |
| I think I smiled waaaaay too big in this one. |
| The final scarf! |
Special thanks to my mother for taking the photos. I couldn't have done it without you.
Subscribe to:
Posts (Atom)