Showing posts with label Christmas. Show all posts

Wednesday, April 16, 2014

Jack Skellington

One of the first cult 'Goth' movies I've ever seen or enjoyed was The Nightmare Before Christmas.  Not only did Tim Burton find a way to make the spooky and creepy parts of Halloween loveable and charming, he also found a way to make Santa into something just shy of nightmare fuel.  I mean, Look at him!
GRRRR FEAR ME!
This is one of the movies where the 'hero' is unclear or understated.  Many people think it's Jack Skellington, but in reality it's Sally.  Sadly, Sally isn't the focus of most fanart.  Jack is.  If it were possible to find more charms of her, I'd make something inspired by her, but Jack's so much easier to work with. 

At any rate.  I made a Jack Skellington bracelet.  I had just enough beads and charms to squeeze a nice cohesive one out.  Take a look.


I used some pretty big honking charms this time.  I couldn't find any of the smaller ones anywhere.  I'd have liked to.  I was able to get ten of those for like 99 cents a few years ago.  Not any more, I guess.

In addition to the charms I added onyx teardrop shaped beads, Czech glass crystals, and swarovski electroplated crystals.  They're meant to emphasize the color scheme and keep it from being too plain.  I like my charm bracelets to have a smooth, undulating feel, despite them being chunky.  It makes them look like a solid band


Here, you can see the effect better.  It looks more like a solid woven band from this angle than a mess of jangly things.

Well, that's it for Skeleton Jack. 

For now at least..

Monday, March 24, 2014

Apple Greens: Playing with Murano glass

For Christmas, I recieved a ton of Murano glass beads from my dear friends, Liz.  Murano glass is a type of bead that is typically hand blown by artisans.  Each bead is completely unique.  I've never really worked with Murano glass before, so I was curious about how to make it work for me.  It was tricky.

Murano glass is heavy, often has slightly irregular shapes and has to be treated carefully in a design.  Because the process of making these beautiful beads is so involved, artists often focus on making truly beautiful beads instead of truly uniform ones.  That can make incorporating them into a necklace design a bit tricky.  Still I pulled it off.  Have a look!

After some careful sanding and selective use of the beads we got this!

Such drama.

Much sparkle.
Alright, that's enough of me imitating the Doge meme.  This necklace was really easy to make and a great break for my wrists since they've been aching an unusual amount recently.  I wish I could post this on my Etsy, but mom snapped it up right away.  Perhaps I'll make something similar sooner or later.

Saturday, January 26, 2013

Pay It Forward

Pay it Forward was a trend that I was curious about, but didn't understand.  I'd seen the words pop up on Etsy, Deviantart, and a few other craft and art hubs.  Sadly, with increased laziness and humanity's increasing inability to articulate itself (despite most entertainment and social networking leaning towards text-based formats), the best explanation of what 'Pay It Forward' was and meant was something like this, "Well, you know.  Pay it forward.  Like you pay it forward."

I asked several different people who were running 'Pay It Forward' advertisements and promotions on their blogs, art hubs, and Etsy stores.  The answer was always something like, "Well, you know.  Pay it forward."  That's not an explanation!  That's a tease.  You've disappointed me again, humanity.  Why do I keep trusting you to do better?? 

So, I sort of shoved that curiosity to the side and focused on other things.  Since no one knew what Pay It Forward was, perhaps it was not important for me to know either.  That is, until one fine literary lady posted a Pay It Forward comment on her Facebook.  My reaction: Another chance to ask what the HECK this means!  Yes!
So, I asked Ann what does 'Pay It Forward' mean.  Being a former English teacher, she was happy to tell me.  It's like a chain letter, but instead of forcing people to repost some annoying message in their status for fear of non-existent reprisal, you substitute the gloom and doom for a good deed.  The theory is, that if it's handled CORRECTLY there's a recurring wave of good deeds and wonderful surprises that eventually works its way around the world.  Ann's Pay It Forward was geared towards crafting.  Golly Gee Willikers Batman!  That sounds great! 
OMG!  For real?
I joined in on her pay it forward...and immediately ran into problems.  Apparently, some people equate 'Pay it Forward' with 'Freebies' and are opportunistic scavengers who will not only assert, insist, and berate you until they get their free thing, but they will also belittle it and refuse to 'pay it forward' themselves.  You know who you are. 


What I learned from this whole thing was heartwarming (I think that was the point of it, actually).  By sticking yourself out there and becoming someone's beautiful surprise, you not only enable them to be someone else's surprise, but you boost their self-esteem and motivate them to try and learn something new themselves.  I have not delivered all of my Pay It Forward gifts, but the few that I have sent off to their new homes were met with glee and almost immediately a chain began to form.

My gift of yarn became mittens for someone who's always losing theirs, and the money that would have been spent on mittens was spent on supplies to make greeting cards, one those greeting cards was written in and given to an old woman, that old woman got up and made someone some cookies, those cookies were eaten at someone's craft party, the craft party spawned all manner of creations and it continues from there.  One, long, heartwarming chain of good deeds.  I hope that it continues beyond what I can trace and maybe, it will get to someone who really, REALLY needs an unexpected gift. 

Tuesday, January 15, 2013

Christmas Hat

Working retail over the holidays kept me busy and tired, so I didn't go to many parties.  Let's face it, you're not going to be raising the roof with your girls if your feet hurt so bad you start thinking it might be better to live as an amputee.  No parties for me.
Knowing that I couldn't attend the Christmas shindigs or even stay in my own house to watch old Christmas movies really stung, so I was determined to make Christmas Eve fun for me- by making a hat.  An ostentatious, LED lit marvel of amateur hat-making science. 

This baby.

Let me start by first saying this: I had no idea what I was doing.  This hat is something made purely on a whim, with no prior experience besides making hair clips.  It also, very quickly, became an experiment to see how much stuff I could cram onto one small oval piece of felt without breaking my neck or having it fall off my head.  Despite this, I think it came out nicely.
I had no pattern to help in making this so I sort of followed my own mind.  It was actually fairly simple to make once I had assembled all the materials.  I'll include pictures of the less common ones.

Materials:
Two sheets of craft felt
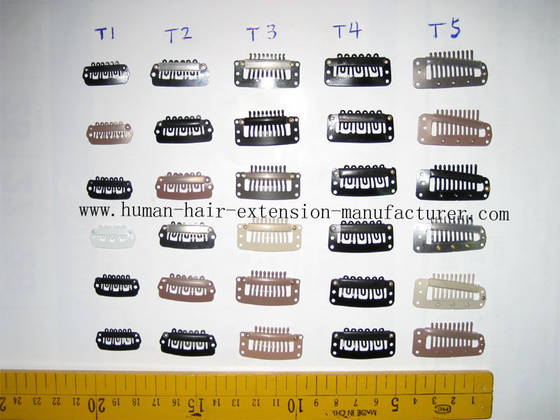
 Two Hair extension combs
Hair Extension Combs: Photo From Human Hair Extension Manufacturer.com
Beads   (Any will do)
Hem Tape
Garland
I used something similar to this
 LED tea light
Christmas Trimmings
Scissors
Wire

Instructions:
1.  Cut the felt into ovals.  They will be your hat base.
2.  Mark where you want to place the combs (it's important that they're opposite one another otherwise it will fall off your head)  Hand sew them to one of the felt ovals.
3.  Assemble your Christmas Trimmings (I got most of mine from the dollar store).  Determine the basic layout you want them in before sewing or gluing them down.
4.  Hand sew or glue (E6000 for the win!) your Christmas Trimmings to the other oval of felt. I wanted a light on my hat so I had to cut a hole so that I could reach the switch.  I also wired a little golden Christmas tree light cover to it so the naked LED bulb wasn't showing. 
5. Hand sew the two felt ovals to one another, making sure the combs and decorations aren't sandwiched between the felt layers.
6. Measure the perimeter of the felt ovals, and cut the wire to that length plus 2 inches.  Twist the ends of the wire over it to secure them so they don't poke you in the head, then shape it to fit in your felt ovals.
7. Hand sew one side of the hem tape to one side of your felt oval.  Fold the hem tape to the other side of the felt oval, tuck the wire in the fold, begin sewing the other side of the hem tape to your hat base, keeping the wire oval inside the pocket formed by the hem tape.  Complete a full circuit around your hat, knot the thread, tuck the end into a hidden spot under the hat and wear. 


It's just that easy.  Why don't you try it?

Sunday, January 13, 2013

Club Holiday Party

(This is totally late, but don't say anything.)
One of my favorite things about the holidays are the parties.  Unfortunately for me, I ended up working retail again this holiday season and thus missed out on a lot of them.  But there was one I refused to miss.  My sewing club's holiday party/luncheon.  They only have three big luncheons each year.  One's in December, the second is the Fashion Show, and the third is in the Spring, just before we have summer break.  If you miss one, you miss all the fun!
And all the Turtle icecream cake.
Every year, the luncheon is located in one of the premier restaurants around the city of Chicago.  Alahambra, The culinary school of Chicago, and many many others.  The food is always great and the people even better.
This year, we had a new events coordinator and she organized some fun games and activities for us to participate in whilst chatting with other crafty ladies.  I was more than a little excited.  Especially for the White Elephant game.  That one's always a big hit at my friends' holiday parties because it invites people to alarm or pleasantly surprise people with random crap that they picked out of the back of their closet or the bargain bin at a store.
White Elephant is a chance to get closer to the people you call friend with a series of hearty WTF moments and then, if you see that someone's gotten something you'd prefer to have, you can trade!  It's everything that was great about lunchtime in grammar school.  Mysterious items from a mysterious benefactor, then trading for your preferred stock.  Everyone has fun.

To date the wildest random white elephant gifts I've seen have been:
A picture of someone else's kid
Tangled Christmas Lights
An Actual White Elephant statue
Prank Candy (It tasted like spoiled fish)
Harry Potter Bertie Botts Beans
A coat from a Thrift store- that turned out to have a $50 bill hiding in the lining of the pockets
A pickle
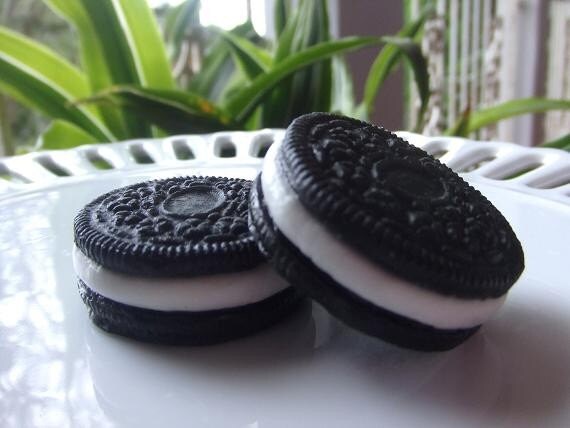
Soap that looked and smelled exactly like an Oreo (You know what happened with that one, don't you?)
A board game called 'What The F***'
A silver necklace featuring a ...well, it was a pendant... but let's say, I'm glad I didn't get that one.  But we had a lot of fun laugh with the poor embarrassed soul who did get it.

Well the day of the club's luncheon, one of the ladies decided that the white elephant should function more like...a weird grab bag and everyone should come up and explain why they gave what they gave.  It really threw off the groove for White Elephant.  Instead of being primarily silly and fun, it became awkward and uncomfortable.
Most people had taken about as much time in picking their gift as they do picking their fingerprints.  For me, the event became downright painful when the person who picked my little basket of embellishments, ribbon, faux leather, and lace blatantly yelled that she didn't want any more 'junk' in her house.  It almost made me wish I hadn't participated.  Thankfully, there was a silver lining.  When it was my turn to pick a gift, I ended up one of the cutest random gifts of all.  You know, because I like stuff that looks like other stuff.

Wow!  A giant spool of yarn!

NOPE!  It's a Linen scented candle

What a cute little hat!

Wait!  The bottom looks like sushi rolls!  It's not a hat at all!

My White Elephant pick came from Rhonda Buss who, apparently, is another person who appreciates the trend of having stuff that looks like other stuff.  I got a candle that looks like a giant spool of thread, has a great fresh scent and when the wax is all burned out, I can use it to tuck my pins and needles in.  The little hat, that looks alarmingly like a little hat I was eyeballing in the store the other day, is actually a pin cushion.  You can flip it over so that it looks like a box of sushi with a bow on the side.  I loved my gift.

Maybe next year, we can play a different holiday game that makes everyone as happy as I was by the end. 

Monday, January 10, 2011

Holiday Bootcamp Aftermath

After a long break for the holidays (I'm so sorry about that!  No, really I am.) I am back.  I sort of got caught up in the whole Christmas spirit and the delight that I was actually able to BUY gifts for everyone this year, rather than making them all like I've done in years passed.  Holiday bootcamp made the difference. 

Now before you protest and say something silly like 'but Agent Ren, your creations are fabulous!  Why would you have reservations about giving them as gifts?'.  The reason is simple.  Making things is what I do all the time.  That kind of takes away from the wow factor when you present someone with a piece of handmade jewelry and they already know that handmade is your thing.  The gift becomes something akin to 'the dreaded knitted sweater from grandma'. 
It's not valuable anymore.  Even if you put hours and hours into making it, it's just another lump of beads that you're forcing them to take.  Why hurt your fingers, spend scarce cash and time to just get one of those tight, uncomfortable 'I don't really want this' smiles?  I didn't break my fingers or my bank account trying to make something special this year.  I didn't agonize about not having time to make things or scraping together enough cash to get nice precious metal findings to make each item extra cool.  I hunted bargains like my life depended on it, squirreled away coupons like I was hiding seeds for winter, tracked every dollar spent with a methodical accuracy that a serial killer would envy, and had everything assembled and half-wrapped in my closet a month before Christmas. 
What's this got to do with Holiday Bootcamp?  Plenty.  I'll tell you the truth.  For all the Holiday bootcamp prep I did for a big holiday sale, I didn't sell that much, barely two c-notes worth.  I spent carefully and some would say abundantly to feed my high rate of production.  I was like a machine, grinding through eyepins, beads and time like a wood chipper and wearing out the blades on my tools twice as fast. 

I was hoping for a big breakthrough as far as sales and ended up only barely covering costs of materials.  What I did sell was stuff that people custom ordered, brooches mostly and other things that I never make en masse.  Despite this, I learned a great deal.  Here are the things that Bootcamp taught me.

1.  Run, Rest, Run:
Run, Rest, Run is the philosophy that when you do something, you go at it full tilt.  You don't burn yourself out, though, because then it'd be Run, Die and end there.  The idea is that you work like a Juggernaut until you get tired, and when you rest, you meditate ways to make your next full-tilt stint go better.  This way, when you start up, you're never starting from zero.  You're starting up from 5 because you're rested AND focused.

2.  There is always a better bargain
The problem with people is that they have a tendency to go with what they know and take the best of they see right in front of them.  You have to teach yourself not to be like any animal and make the logical choice in front of you.  You have to teach yourself to go onward.  I ran into this time and again with tried and true connectors that I have scores of.  After a while seeing the same exact elements in piece after piece makes those elements rather 'meh'.  So, I'd half-finish a set and move on to the next while I waited to find something better to finish the first.  It turned out to be a good plan.

3.  Substitutions shouldn't diminish quality
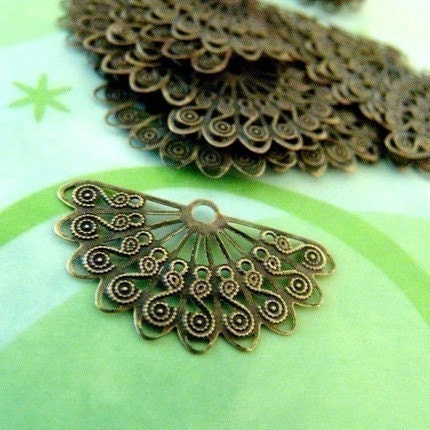
To go with the previous comment, when you're selecting new options, don't just grab any old cheapo substitute that kinda fits the description!  Go on and pay some money for the good stuff.  It's often worth it.  Otherwise, you'll be stuck with a bunch of brass fan charms thinner than tissue paper and twice as pliable... Like me. 

I don't know what I'm going to do with these things, but I haven't the heart to throw them away.

4.  Buy in bulk
If you can, buy in bulk.  Always.  I guarantee you that there will come a time when you're making something and you'll wish for some beads or findings that you've already used up.  Maybe they'll be for another necklace.  Maybe they'll be for decorating a trinket box.

5.  Keep your tools in good shape
After a lot of heavy use, it becomes obvious when your nipping pliers get dull. Things just don't cut.  They just bend and you end up with a nasty looking chewed up piece of wire, bit of a finding or something equally horrible and bad for design.

6.  If you're tired, stop working
You can't 'keep working through the pain'.  You'll end up messing up and leaving your genetic material on the thing you're working on in a way you didn't want to.

7.  No one has any originality any more.
You won't find any clients in this unstable economy that possess a lot of originality.  There is no one who will come to you with a commission knowing exactly what they want.  It's frustrating, but it's up to you to guess what they want and what they need.  You have to be ready to address the want FIRST and then, when it leads them to disaster, address the need.  Hundreds of people may look at your displays and decide that your stuff's 'not for them'.  BUT, the moment they see an item they snubbed looking great on someone else, they will want that exact item, believing that it will look the same on them.  I've no idea what dictates that logic, actually. 
However, I did have a young woman with a very short, thick neck who wanted a 3-inch wide choker made 'just like the one you wore to the Emily Autumn concert, the one posted on your deviantart', despite my attempts to lead her to a thinner 1 and a half inch wide choker band.  This same young woman was distraught when the choker folded in and got lost under her chin.  I was unsurprised, and therefore had a solution on hand.

8.  Don't waste time
This ties in to #2.  In waiting for proper items to pop up to finish a piece you've already started, don't just sit on your hands waiting for magic.  Get inspired and keep working.

9.  Double Check your work
With a a magnifying glass and tweezers.  Maybe an physicist too.

10.  Everything is Material
I used a quarter to balance out a brooch this passed weekend.  It was cheaper than buying a cabochon frame, just as effective, and twice as eye popping.  What'd you do with your quarters?  Huh?  You put them in the soda machine didn't you?

The result of applying these learnings to Christmas shopping were readily noticeable.  I didn't go into debt trying to get something I felt was 'worthy of giving'.  I also was able to get a better quality of whatever it was I gave by clipping coupons and working hard.  I played the 'How long can you keep 20 dollars' game like a pro.  Instead of squeezing those 20 dollars till they screamed, died and came back as moaning zombies, I put them to work and made them grow with careful and wise spending.  What's more, I got more laughs, screams and wails at the gifts I gave.  I even gave small gifts to clients.  Squeals of "OMFG!  THIS IS AWESOME!" rang from as far as California.  I made girls feel pretty, made moms jealous of their daughters, made muscle guys break their diets, and got to laugh at my dad because he mistakenly ate soaps that looked and smelled like oreos.  Apparently, they tasted like oreos until they started to foam up in his mouth.  Love you Dad

Thursday, December 16, 2010

Feather Clip Tutorial

If you've ever searched for a glamorous and unique gift for a glamorous and unique Hairphile only to come up empty handed, or flat out broke, this tutorial is for you.

Here are the materials you'll need before you start:
Leather of moderate thickness, no thicker than 3 mm, though.
Feathers
A 1.5 inch long, undecorated snap clip.
White Dressmaker's Pencil
Scissors
Exacto-knife
E-6000 Glue
Other embellishments

And here are your instructions, with pictures, yo!

Step 1: Draw oval shapes on your leather with your Dressmaker's Pencil.  They should be about 2-2.5 inches long .  Cut them out.


Step 2:  Draw 4 horizontal lines on your oval.  I use a special order to make sure I space them according to the hair clip size so that the leather won't interfer with the snap-clipping action.  Draw the first line about half an inch from the top of your oval. The second line should be about 1/4 of an inch down from the first.  The third should start a half inch down from the second and the 4th should be 1/4 down from the third.  Easy?  Easy.
The lines are faint, but there.

Step 3:  Use your exacto knife to slice along the lines with a firm and even pressure.  Don't slice like you're the serial killer in a slasher flick, slice like you're the plastic surgeon working on the face of a model who retired after someone threw acid in her face.  VERY carefully.  You may have to repeat in order to slice completely through your leather.  Be patient.  Neat lines will make all the difference when you start really working with this.  In the end, you should have 4, straight and even slits
You can see the end of my pinky poking out of one of the slices.

Step 4:  Unsnap your snap-clip and thread it through the slits you've made.  Start with the second slit, pushing the pointed end of the clip through it. Weave it through the remaining slits much like you would weave those pieces of construction paper together in grade school to make place mats.  Once finished with that part, take the rounded back end of the clip and work it up through the first slit.  Adjust the clip so that it rests evenly in its leather flap.  When you're done, the rounded end of the clip should poke out of the 'top' of the leather flap, while the pointed end should poke out of the 'bottom' of it.  Actually the pictures for this tutorial are a little off.  I was rushing.  The pointed end of the clip should come out of the rounded end of the oval.
Observe as I take a picture with my shaky hands whilst gluing

Step 5:  Leave the clip unsnapped.  This will keep you from accidentally gluing your clip SHUT.  That'd be a bummer.  Glue the rounded end of the clip to the leather underneath it.  Be careful not to get glue on the underside of the clip.  Now, glue the pointed end to the leather above it.  Again, make sure not to get glue on the other parts of the clip.  You will regret it.  Press the leather against the two ends to help secure it and leave the clip to dry a bit- I usually wait about 30 minutes to an hour. 

Actually, the clip should be put in the other way around.  Having the rounded end of the clip at the rounded end of the oval leads to you having a face full of feathers.


Step 6:  Snap your clip shut.  If it's dried enough, the leather will not snap off the ends you glued it to.  If it's not dried enough, press the leather against the ends of the clip again and allow it more drying time.  Start gluing on your feathers, beginning from the outer edges and working your way in.  Be sure to draw even, lines of glue over the leather parts of the clip from top to bottom.
I have added the red feather.

Step 7:  Add a second layer of feathers for fullness.  It's tricky to glue the second layer on.  The original layer of feathers may shift.  Just push them back in place.  Make sure that if there are portions of the hair clip base showing that you cover those with feathers.  Allow the clip about 30 minutes to dry for a bit. 
I added a layer of red feathers, and then a few black ones for decoration.

Step 8:  Allow the clip about 30 minutes to dry for a bit.  Add any other embellishments you want to finish off your feather clip.  In this one, I used sequins and a fancy de-shanked button.  Let the clip dry COMPLETELY, usually for about 10-24 hours.  Now the glue has cured and the clip is wearable.  Enjoy.
The finished product.  I do recommend trimming any visible glue from the clip so it looks professional.  This is just a quick hack job.  The real clip looks MUCH better.

With that all wrapped up, I should probably do the Etsy Shop of the Week... Especially since I forgot to last time. 
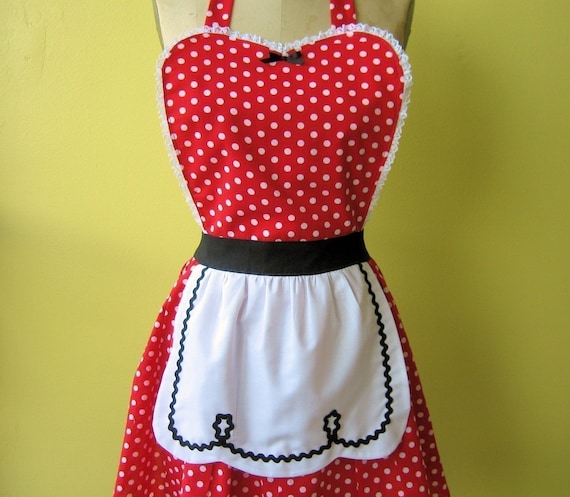
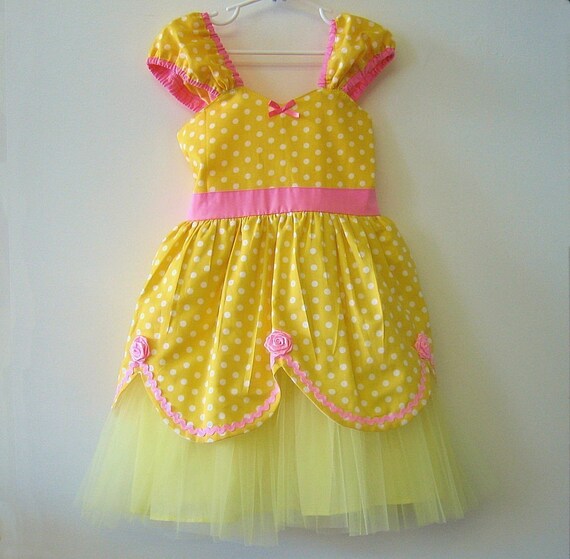
This week's feature is LoverDover's, a children's dress and adult apron shop styled after the fashions of the early 20th century!  The whole shop looks like it was born in the era of 'I Love Lucy', splashed through the psychedelic colors of the 70s, and tripped into a 50's diner.  I LOVE IT.  This is a 'definitely' for any retro housewife and/or kitchen diva.  Take a look at my choice picks!

Little Red Riding Hood Dress

Cape and Blouse are sold separately in the shop.  Dress comes with a little blue apron


I Love Lucy Apron

Front
Belle Princess Dress


Thursday, December 2, 2010

Funky Stretch Bracelet Tutorial

For this week's 'episode', I'll be instructing you guys on how to make a cute bracelet worthy of gifting!  All you need is some stretchy cord, bugle beads, bicone beads, stringing glue and about 20-45 minutes of your time.  I know that's a big time gap, but to be honest, it takes people longer to do this sort of thing on their first couple of tries.  Once you get the rhythm, Ooooooh baby, it won't take you long at all.  I can actually make 3 of them in 45 minutes now.
Anyways, here we go!  Take a look at your materials!
Stretchy Cord


Bugle beads


Bicone Beads

Stringing Glue


Instructions:
Step 1:  Place your first beads
Measure a length of stretchy cord 3.2 times your desired length.  Don't look at me like that, YES it has to be that long.  Now, start with 4 beads in the following order- bugle, bicone, bugle, bicone.


Step 2: Move to your next row
This step is 'tricky' or so I've been told.  Take the end of the string opposite your last bicone and put it through the hole of the bicone that the first string exits  The result should look like this:
If it looks like this,

you put the string through the wrong hole!  Pull it back out and put it through the other hole.  Pull taut.
Step 3: Continue the trend!
Place 2 beads on one strand in the order: bugle, bicone.  Then place on bugle bead on the opposite strand.  Work the bugle strand through the 'exit wound' of the bicone (ONLY the bicone) on the opposite strand, just like you did in Step two.  Pull taut.  You see how this is going?  Yeah?  Repeat until you get close to your desired length.
Step 4: Finish it!
Stop a centimeter or so shy of you desired length.  If you keep going, you'll have a loose floppy bracelet, not a stretchy one!  Make sure the end of your chain has no bugles on the free strands.  Now, place a bugle on each 'free' strand.  See, that?  Yes, I know I contradicted myself, but I'm doing it so you don't make the mistakes I did.  Now, pull those strands through your FIRST bicone, you know, the little guy you put on between the two bugle beads at the very beginning of your bracelet!  Unfortunately, I don't know how to draw that in MSPaint, so, you'll have to use your imagination.

Pull taut.  Tie the strands, double, or triple knot them.  Then, apply a small blob of glue for extra hold.  Allow the glue to dry.  Cut the excess cord as close to the knot as possible.  TADA!  You're done.

Note: Try using different shapes and styles of beads to get different bracelet effects.  You can even make a wavy effect by using bicones of graduated sizes!  Experiment with the length of your 'chain' to make rings and chokers too!  Just remember, use clasps for the chokers... you don't want to strangle anyone.

Thursday, November 18, 2010

Making Christmas, Making Christmas

I've been stressing holiday bootcamp a lot lately and keeping up with it fairly well.  I've been able to make a little money, save a little money and plan out possible bought gifts (which I can really afford!) for my close friends and relatives.  However, there's usually at least one Ren-Made item in the lot of Christmas gifts.  It was when I was perusing my stash that I noticed that I've taken absolutely no time out to make any heartfelt, handmade Christmas gifts for ANY of my family members.  Uh... Oops.
Then, of course, I overheard some of my sweet aunts randomly chattering about how excited and proud they are about my little side-business and how they've kept up with my deviantart page and can't wait to see what I've made for them for Christmas.  Uh.... Oops!
So... Holiday Bootcamp's discipline will now be applied to gift-making and planning.  To pacify all THREE of my faithful readers, I'll post a couple tutorials- maybe a reflective piece for you guys to gnaw on while I get busy.   All this, it's no big deal, right?
I've still got time and now, NOW, I also have legitimacy.  I made my first PURELY online sale a couple days ago.  Why is that so important?  Well, it's important because that means that all my DA posting and Etsy fiddling and all that enabled me to make someone want to buy something that I MADE simply because it looked good on a photograph.  That means, that my stuff looks professional from every angle.  That means, I don't have to work myself to sell a product.  It sells itself.  I feel... lightheaded.
That said, my Etsy Shop is now open for business.  There aren't many items RIGHT NOW, but there will be... soon.  I'm pacing myself.  If I post everything at once, I'll have a mondo huge listing bill and I won't be able to personally sell anything in my inventory.  So, for now, I'm plucking out some of my best pieces and putting them up for the possible online market. 

And now!  Before I forget, our Etsy Shop of the Week!

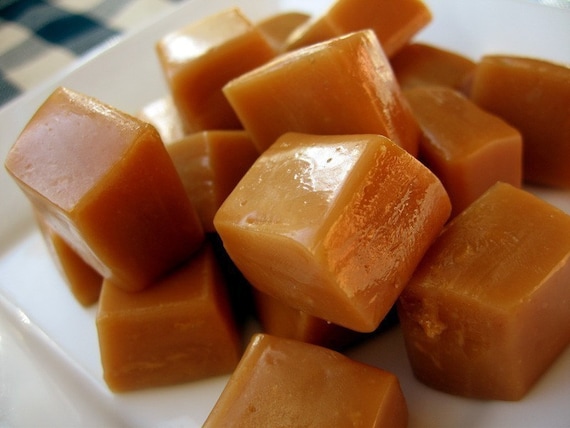
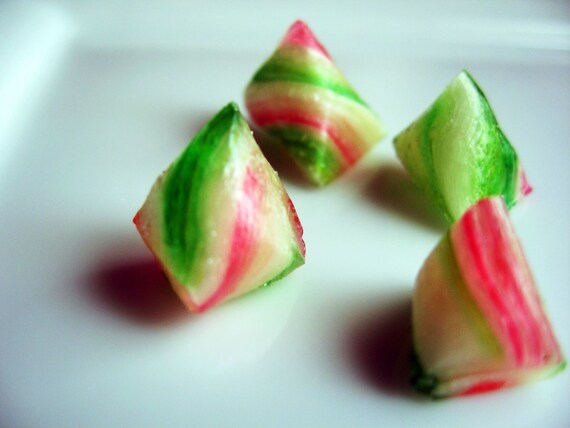
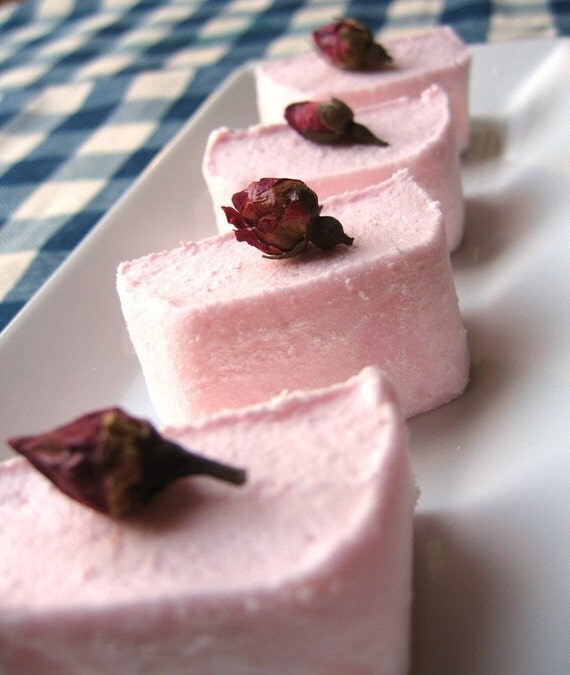
This week's feature is one mouthwatering, jaw-dropping marvel that'll excite your sweet tooth.  Fusion Sweets caters to any gourmet sweet tooth's deepest desires.  Run by the mother/daughter team of Kay and Angela, the shop offers enchanting new takes on old favorites from marshmallows and butter caramels to traditional hard candies, all in exciting and innovative new flavors.  Everything is handmade, organic and flavored with real, all natural ingredients.  You can even get custom orders!  Here are some of my personal favorites.

Peanut Butter Caramels


Guava Lemongrass Berlingots


Neopolitan Marshmallows


Rose Infused Marshmallows


Wicked Cool huh?  I might get me some of these treats for the holidays!

Friday, November 5, 2010

Gifts Anyone could love

So, you're back for more, huh?  You really want to see those things that everyone would find amusing to make the whole awkward 'Getting to Know You' song and dance avoidable, huh?  Well, alright, but only because I wanted to share this stuff with you guys anyways!

Here are a couple websites that offer cute and unique things for a variety of prices.  But, before we get started, let me warn you, as a college student born to an environmentally-conscious middle class family who's mantra is 'haste makes waste', I am the virago of bargain hunting.  At the same time, I am the only child, a Leo and rather prone to spoiling myself, so I'm also really keen on good quality.  That said here ya go.


1.  The Fifteen Dollar Store: $
Yeah, who doesn't love designer stuff for JUST 15 bucks?  I know I love it! 


2.  Sock Dreams:  $ through $$
Who would have thought that you could have dreams about socks?  Well, I have dreams about THESE socks. The socks at sock dreams are all made from high quality fibers and not only do they have a broad selection of socks that will stand up to the coldest of Chicago Winters, they also have the sexiest knee and thigh-highs I've seen to date.


3.  Think Geek: 
With everything from TV remotes stylized like Harry Potter wands to Lightsaber pens to dissolving travel toiletries, Think Geek is your headquarters for all things nerdy and geeky.  Most things will be a guaranteed hit with guys because they're full of action, sci-fi guy movie goodness with wicked applications of technology in the most unexpected ways.  Hmm.. OOH!  They have power inverters!  Ahem. Anyway!...


4.  L'Occitane en Provence: $$ through $$$

As far as wholesome, sustainable luxurious health and beauty goods go, L'Occitane is THE BEST.  All of their fragrances, hair care products and body potions are made with all natural ingredients and essential oils.  I'm a big fan of their hair products and body creams.  My skin and hair have never been this soft and well nourished.


5.  eBay: $ to Infinity!
Like you didn't see THIS one coming.  Um, can I just say, you can find ANYTHING on eBay!  I've gotten everything from white gold and onyx pendants to printer ink cartridges for a fraction of their regular prices on eBay.


6.  Retroscope:  $$ through $$$
Thinking of doing period costume, or just snagging a few crazy stellar pieces?  Retroscope is one of my favorite places to window shop.  With their saucy bustle skirts and very feminine ruffled shirts, they have been on my mind since I first heard of them 3 years ago. 


7. Etsy: $ to infinity!
I have been quoted time and again that Etsy is the 'rich folks ebay', but even I can't deny that Etsy has some pretty COOL stuff on it.  I shop there all the time, for myself and for others.  There are all kinds of handmade, one of a kind gifts and 'gifts for you' to be found on Etsy, so don't knock it till you've tried it. 
Finally a Featured Etsy seller for you!
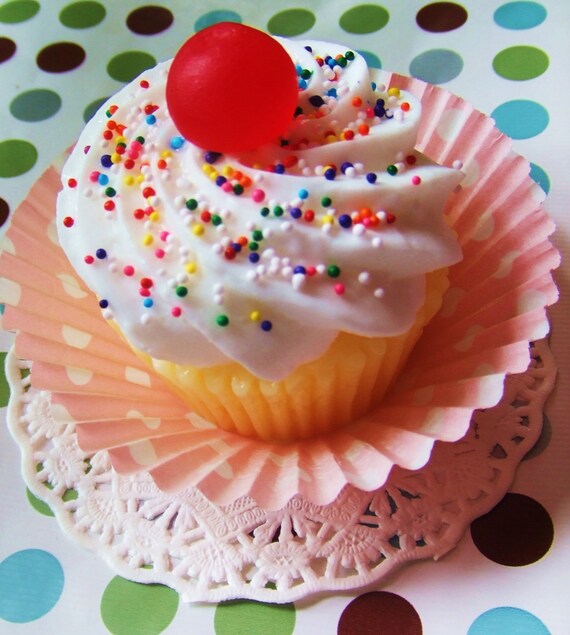
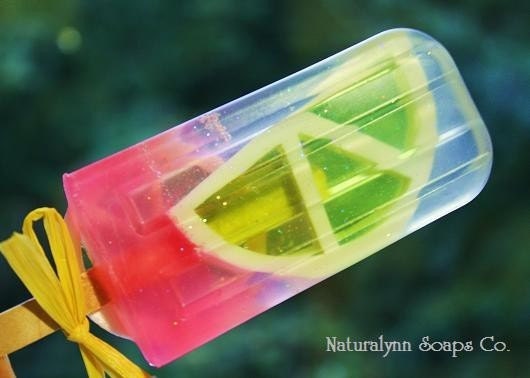
Naturalynn: Featuring handmade soaps in a variety of shapes colors and styles, Naturalynn wraps your body in affordable essential oil infused luxury.  Here are a few of my ABSOLUTE favorites

Vanilla Cupcake Soap:  

Oreo Cookie Soap: 

Cherry Limeade Popsicle Soap: